Power Apps / Automate – Input data in app and write it to Excel (Office Scripts)
15 steps
Introduction:
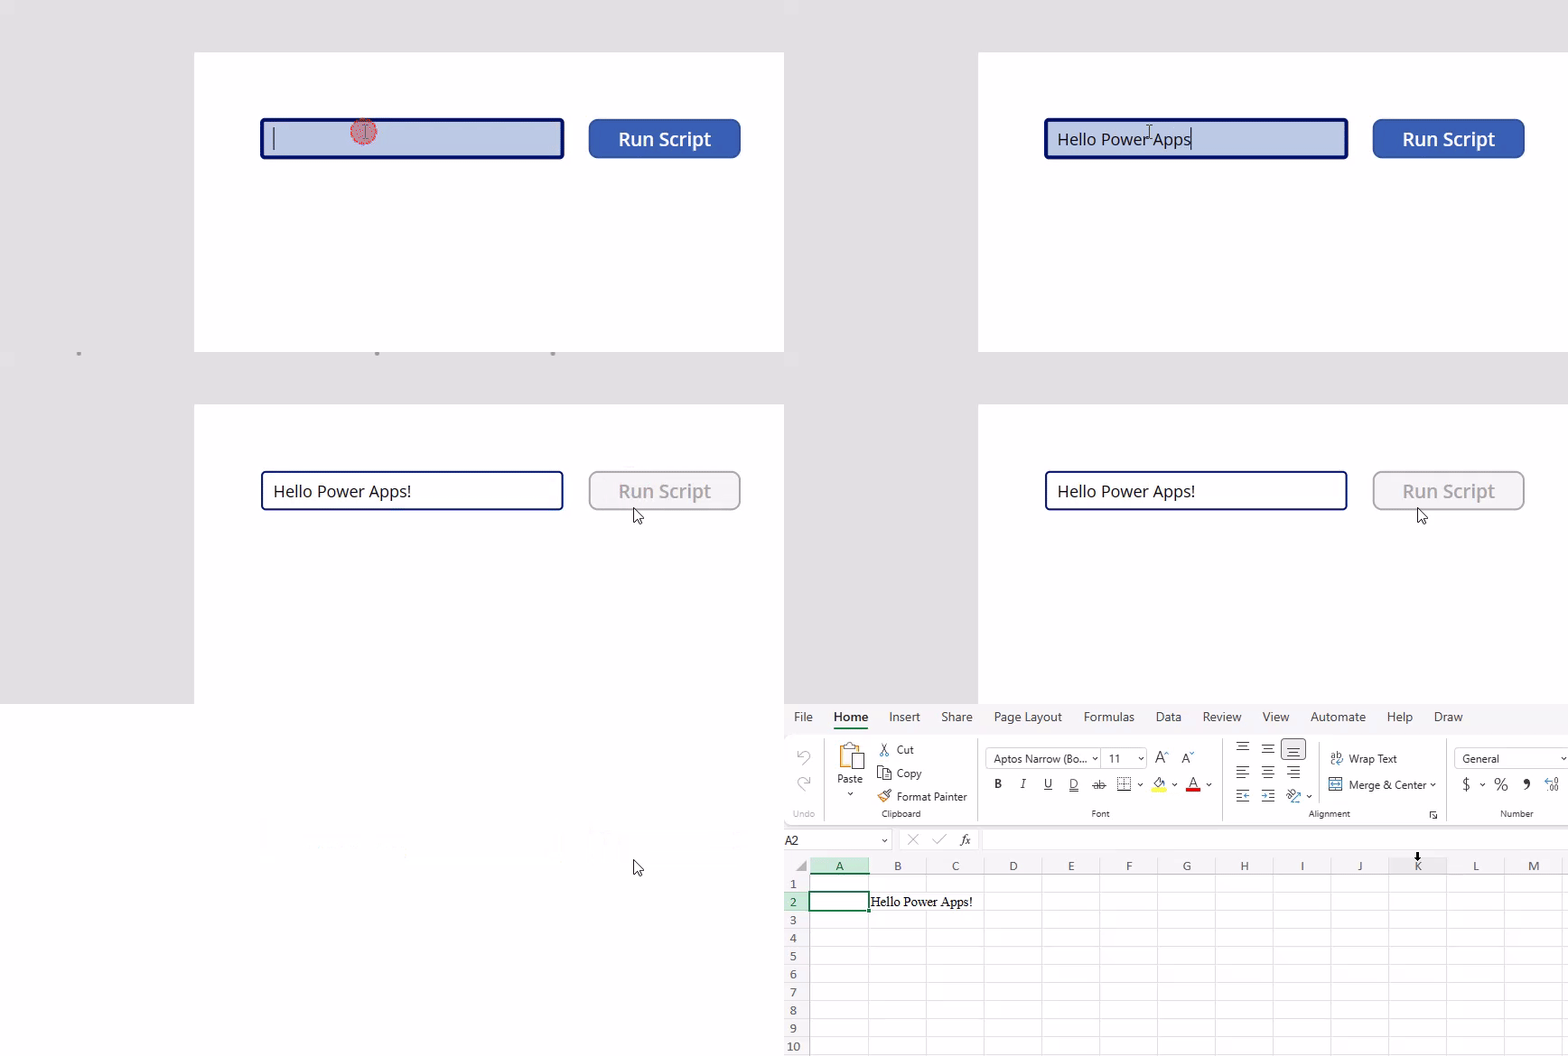
This is the blueprint on how to use Office Scripts to transfer single value data from your Power App to an Excel file.
Prerequisites:
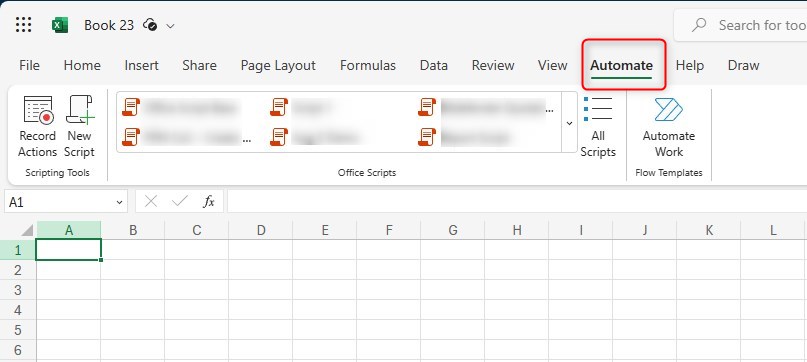
Make sure that you can see the Automate tab in either your Excel Desktop app or in Excel Online. Organization settings and licenses enables this one. You will also use your OneDrive account for tests.
Step 1:
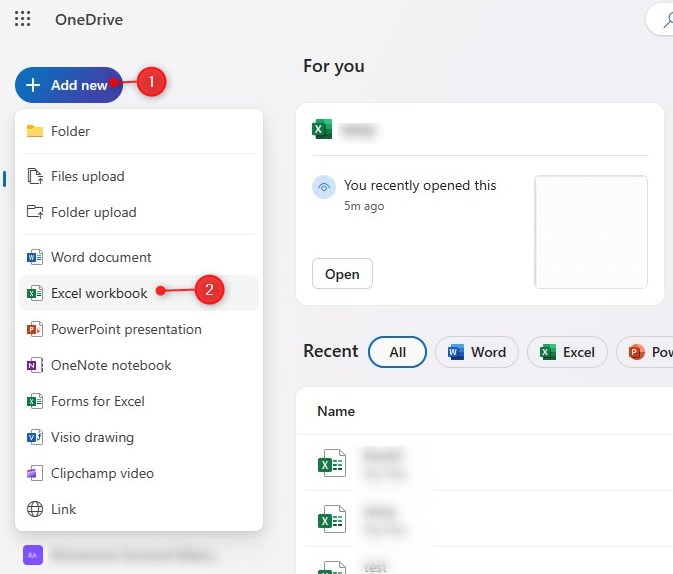
From your browser, go to OneDrive. From the home page of OneDrive, do the following:
- Click the “Add New” button
- Click on “Excel workbook”
Step 2:
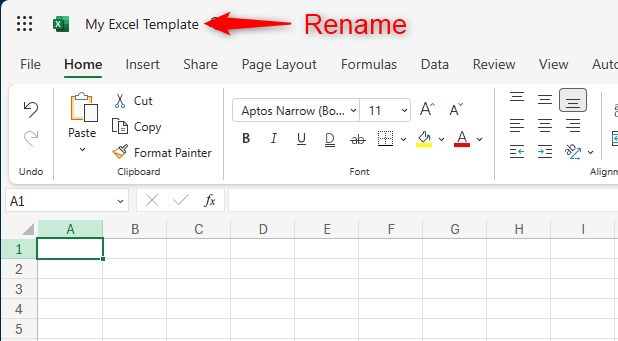
A new workbook (Excel file) will be opened in a new tab. Rename this workbook into My Excel Template.
Step 3:
From this Excel file:
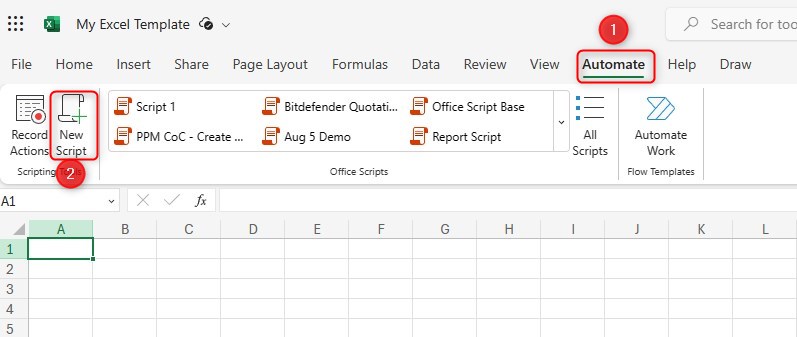
- Click the “Automate” tab on the ribbon
- Click the “New Script” button. A new pane on the left side will appear.
Step 4:
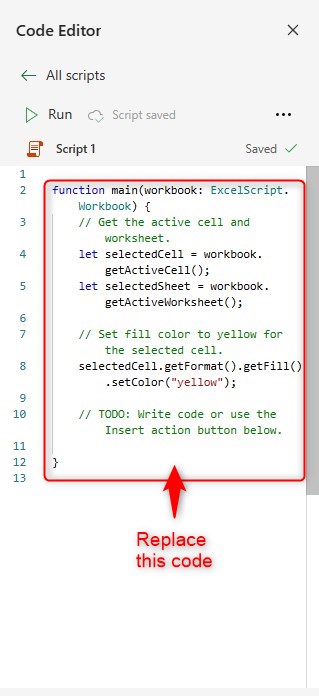
On the script pane. You will see a pre-made script that is available by default. Replace that script with the one below:
function main(
  workbook: ExcelScript.Workbook,
  TextFromPowerApps: string
) {
//Change "B2" to the cell where you want to the value to be
  workbook.getActiveWorksheet().getRange("B2").setValue(TextFromPowerApps);
}
Step 5:
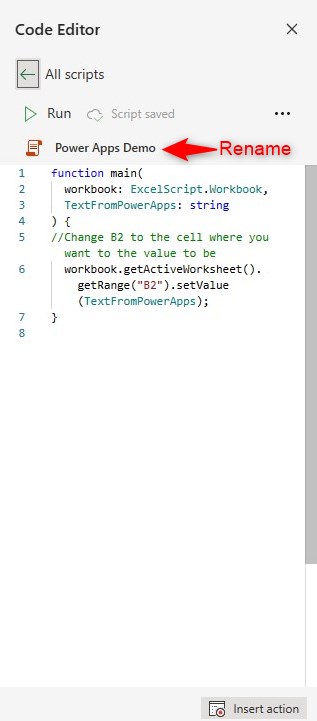
Rename the script title as Power Apps Demo. Save the script. Close the browser tab of the Excel file.
Step 6:
Create a new app using a blank canvas in Power Apps. From a blank canvas, do the following:
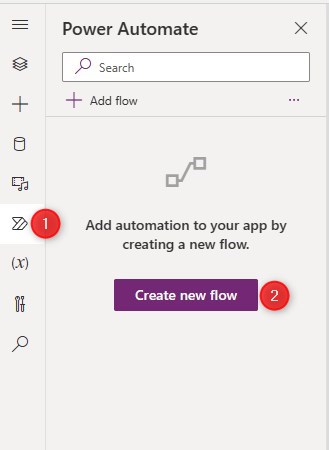
- Click the Power Automate icon on the left pane
- Click “Create new flow”
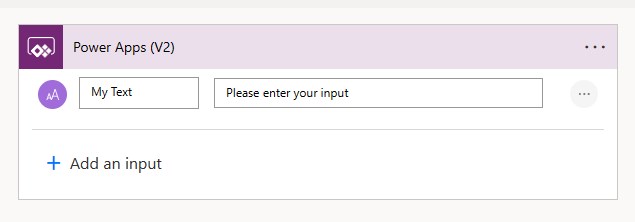
Step 7:
In the PowerApps (V2) trigger. Add the following inputs:
 My Text
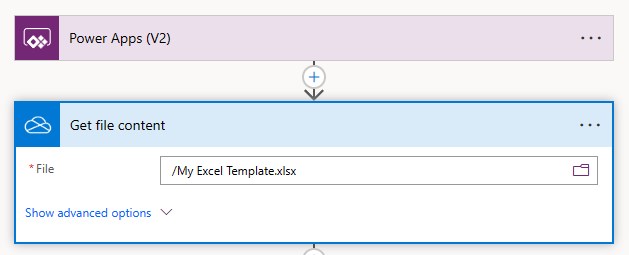
Step 8:
Add the action below:

Get file content
File (pick from file picker)
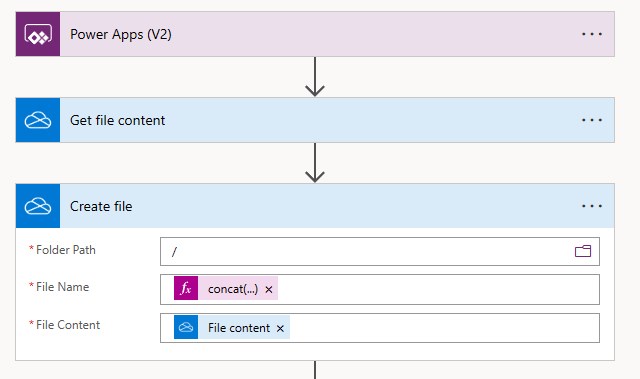
Step 9:
Add the action below:

Create file
Folder Path /
File Name (paste this in the Expression tab)
concat('test',formatDateTime(utcNow(),'yyyyMMdd-HHmmss'),'.xlsx')File Content 
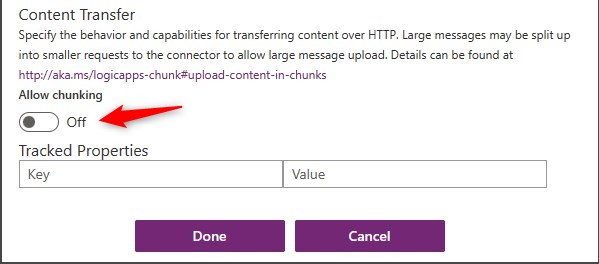
Step 10:
Go to settings of Create file. Turn Allow Chunking to Off so that the file will overwrite existing ones.
Step 11:
Add the action below:

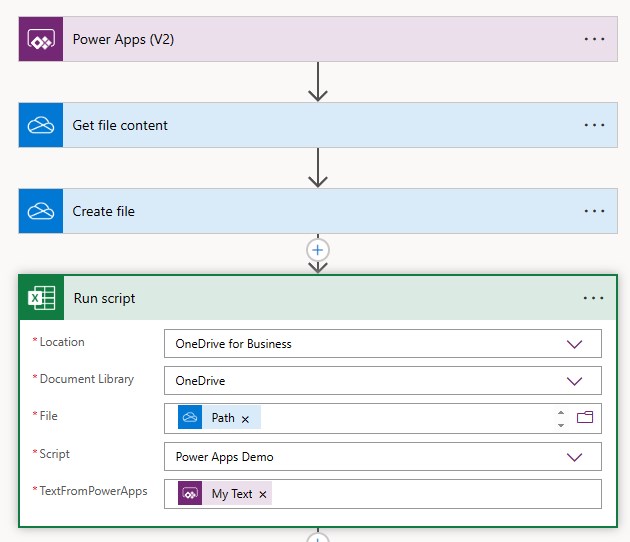
Run Script
Location OneDrive for Business
Document library OneDrive
File 
Script Power Apps Demo
TextFromPowerApps 
Note: the TextFromPowerApps field will not appear until the Script field is filled up correctly as Power Apps Demo. It may take a few seconds to load.
Step 12:
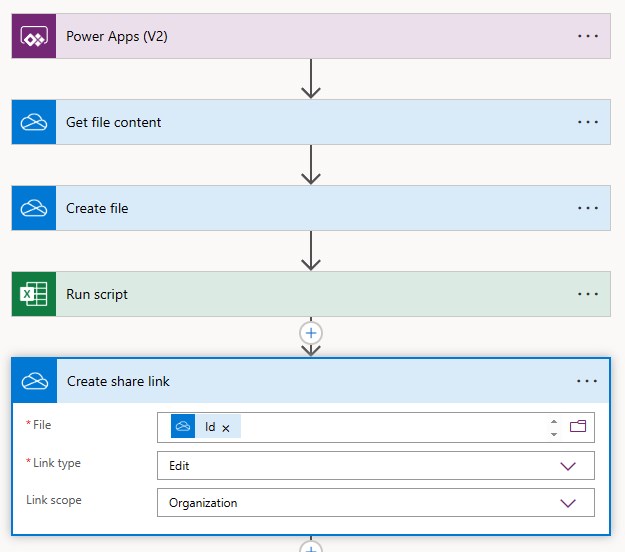
Add the action below:

Create share link
File 
Link Type Edit
Link scope Organization
Step 13:
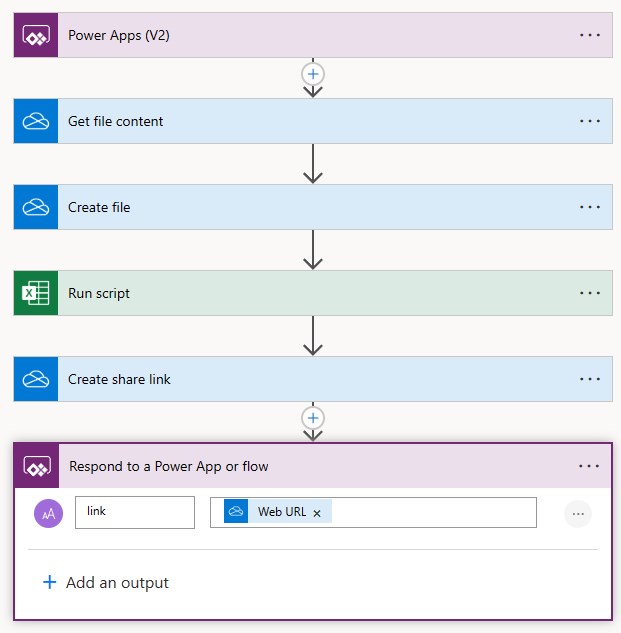
Add the action below:

Respond to a Power App or flow
 link =
Checking:
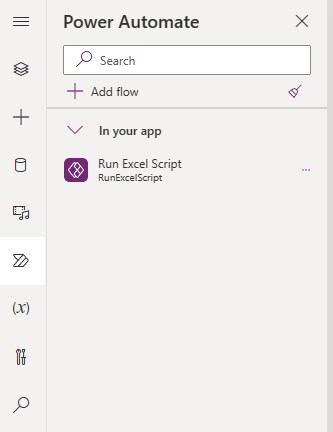
Rename the flow as Run Excel Script. Save the flow and exit. You should return from the Power App studio.
The flow named Run Excel Script should be in your Power Automate pane.
Step 14:
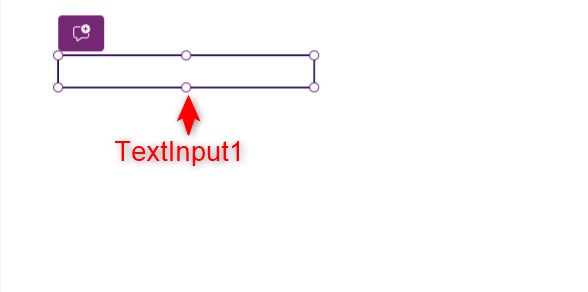
On the canvas of your Power app, insert a text input named TextInput1. Change the following properties:
Default property
""
Step 15:
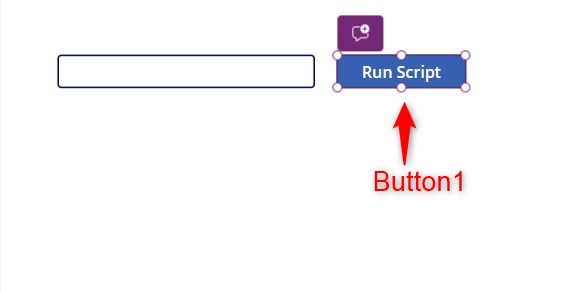
Insert a button named Button1. Change the following properties:
Text property
"Run Script"OnSelect property
Launch(RunExcelScript.Run(TextInput1.Text).link)
Conclusion:
To test, hit play mode. Enter any text inside the text box. Then click the “Run Script” button. In a few seconds, a new tab will appear with the Excel file and the value that you have input in the text box on cell B2.
Note: Every time you push the button, a new file will be created in your OneDrive. Make sure to delete them after you are done testing.
Did this article help? Let us know how we can improve. Send us a message by clicking the “Contact Us” button below.
Article last updated on May 15, 2024
Need expert guidance on Power Apps?