Power Automate – Get attachments in SharePoint library and send to email
10 steps
Overview
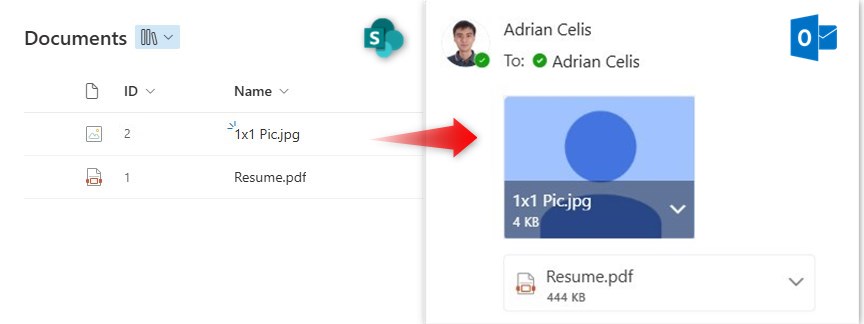
Attachments can be stored in an item of a SharePoint list. In Power Automate, we can get the attachment contents and send them through email. Proceed with this blueprint to find out how.
Our Set-up
![]() SharePoint Document Library
SharePoint Document Library


Note: The ID and Name columns are all SharePoint library default columns. In this example we will only have two files in the library: A PDF file named Resume.pdf and an image file called 1X1 Pic.jpg
Step 1: Manual Trigger

Step 1:
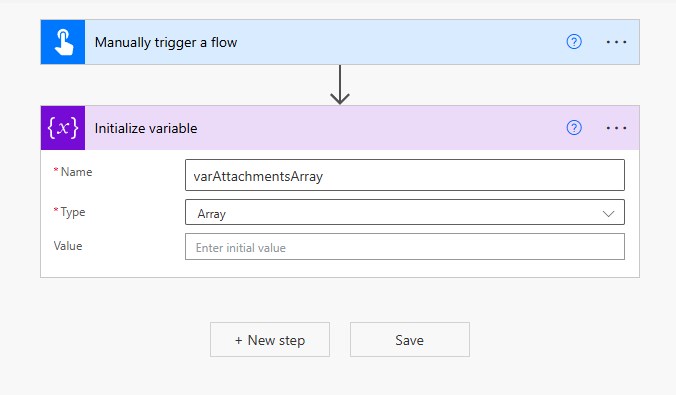
Create an Instant cloud flow with manual trigger.
Step 2: Initialize variable
Step 2:
Add Initialize Variable.
Name
varAttachmentsArrayType
ArrayNote: Leave the Value field blank.
Step 3: Get file properties
Step 3:
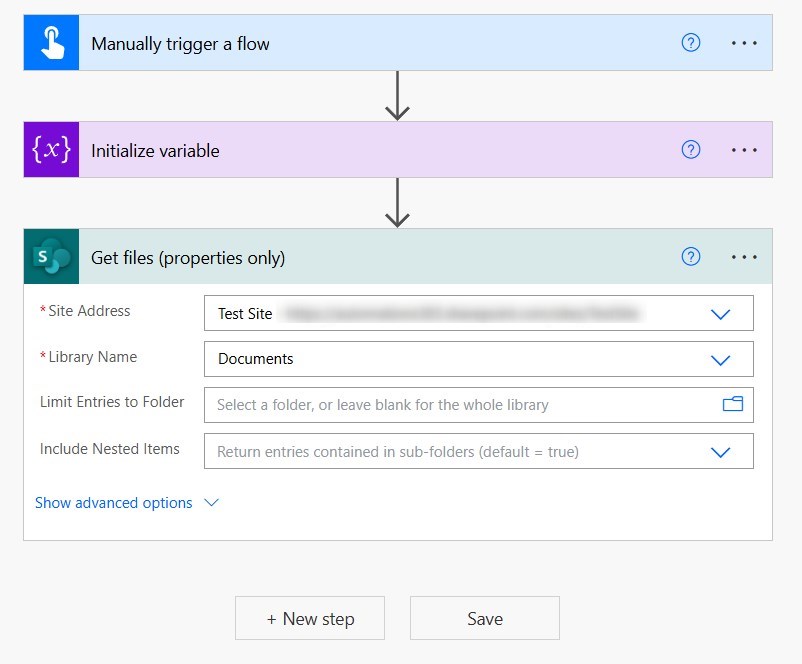
Add Get files (properties only) (SharePoint)
Site Address
[Site where your Document Library is located]Library Name
DocumentsNote: In this demo, since we only have two files in our library, we will get both of them. We do not need to add a filter.
Step 4: Get file content
Step 4:
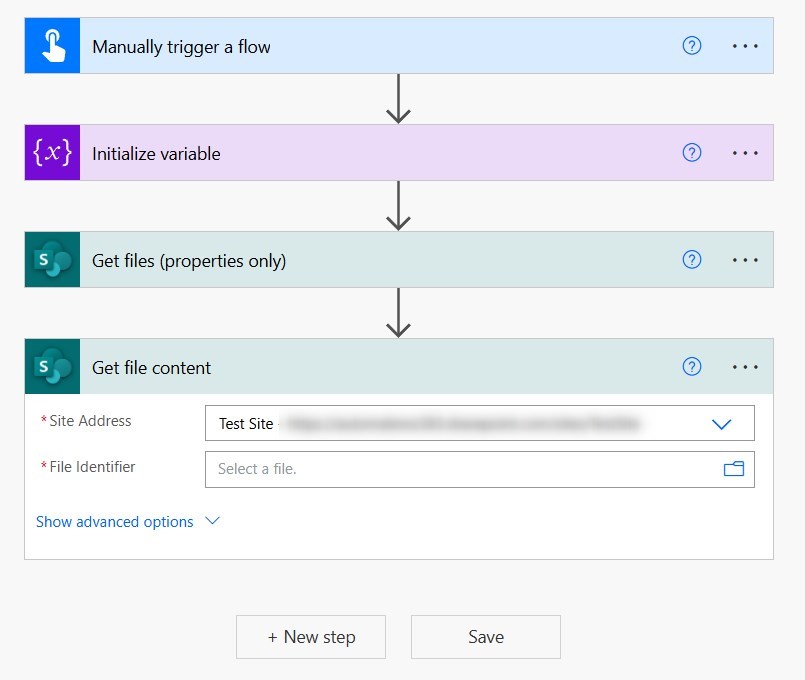
Add Get file content (SharePoint)
Site Address
[Site where your Document Library is located]Note: Leave the File Identifier field blank for now. We will do this in the next step.
Step 5: Apply to each
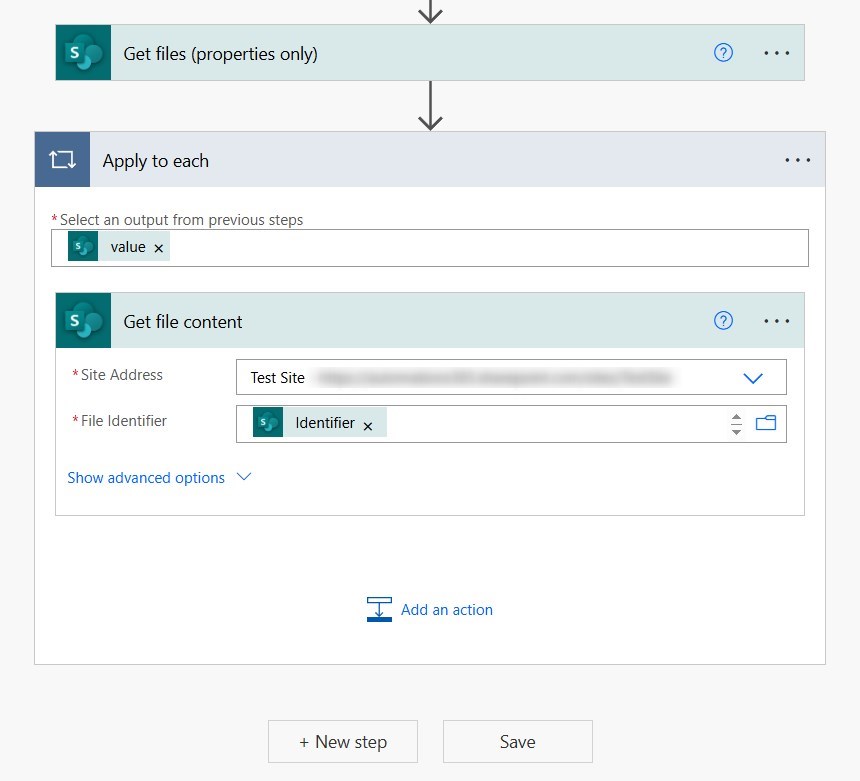
Step 5:
In the same action (Get file content), fill out the remaining field.
File Identifier
Note: Once you put in the dynamic content in File Identifier field, an Apply to Each will automatically enclose the current action.
Step 6: Append to array variable
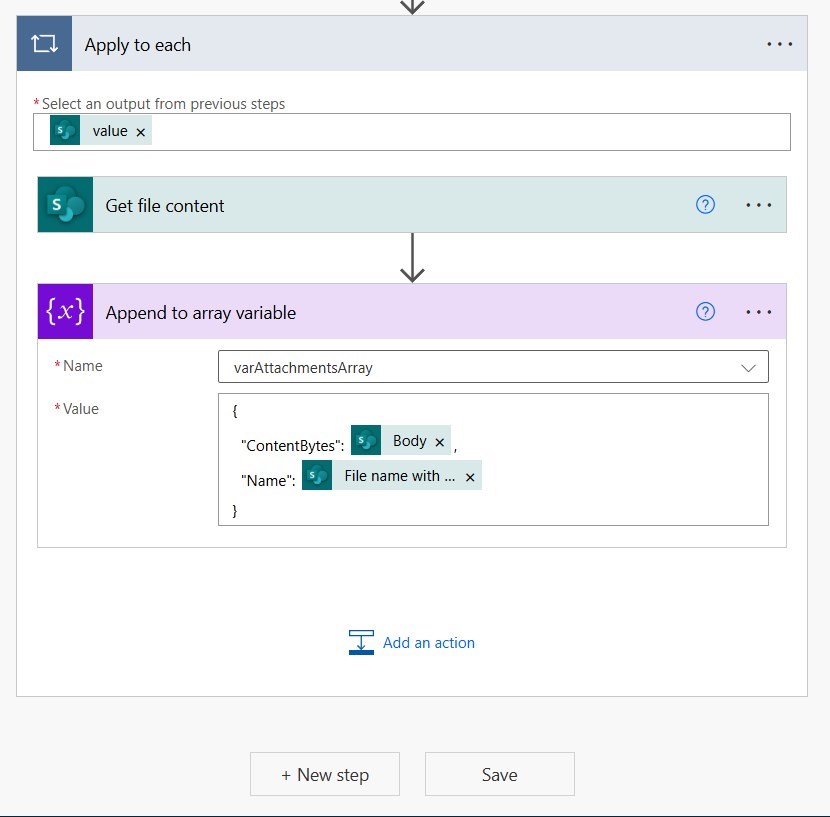
Step 6:
Inside the ‘Apply to Each’, add Append to array variable.
Name
varAttachmentsArrayValue
{
  "ContentBytes": @{body('Get_file_content')},
  "Name": @{items('Apply_to_each')?['{FilenameWithExtension}']}
}
Note: Copy the code above and paste it to the field. Once pasted, it will look like something below:
“ContentBytes”:
“Name”:
}
Step 7: Send an Email
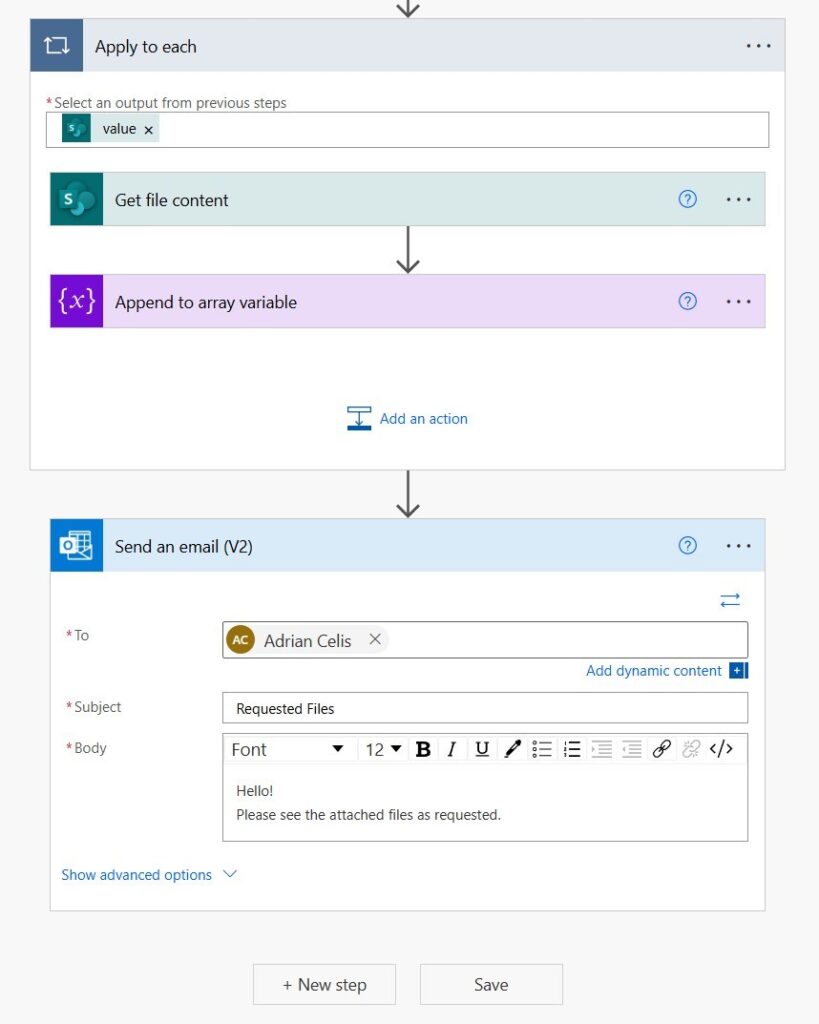
Step 7:
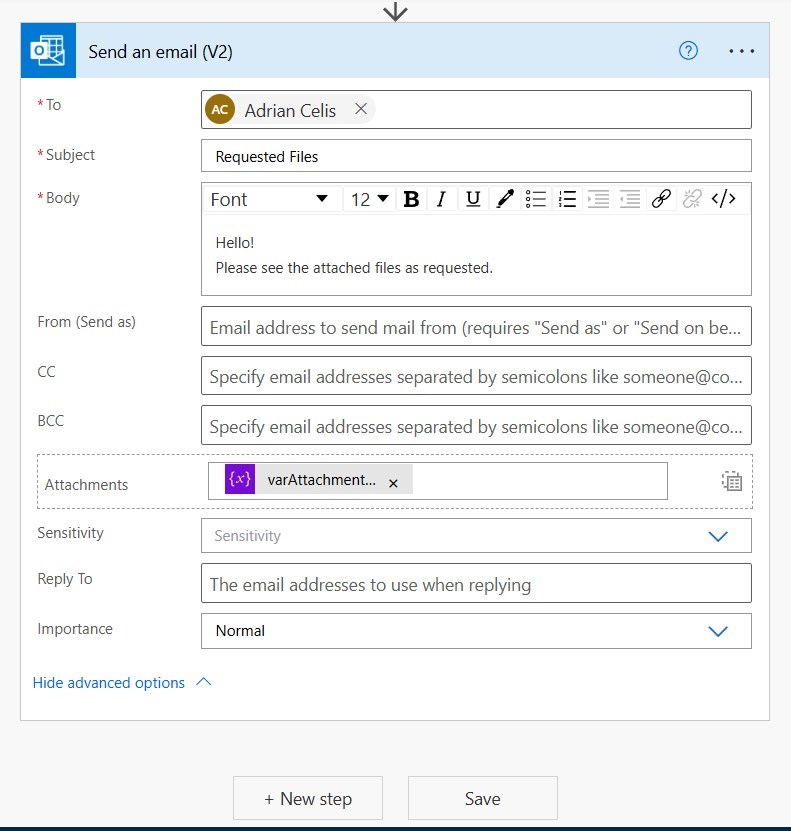
Outside of ‘Apply to Each’, add a ‘Send an email (V2)’ (Outlook).
To
[Your user profile or your email address]Subject
Requested FilesBody
Hello!
Please see the attached files as requested.
Step 8: Send an Email – Show advanced options

Step 8:
On the same action (Send an email (V2)’), Click ‘Show advanced options’.
Step 9: Send an Email – Switch to input array
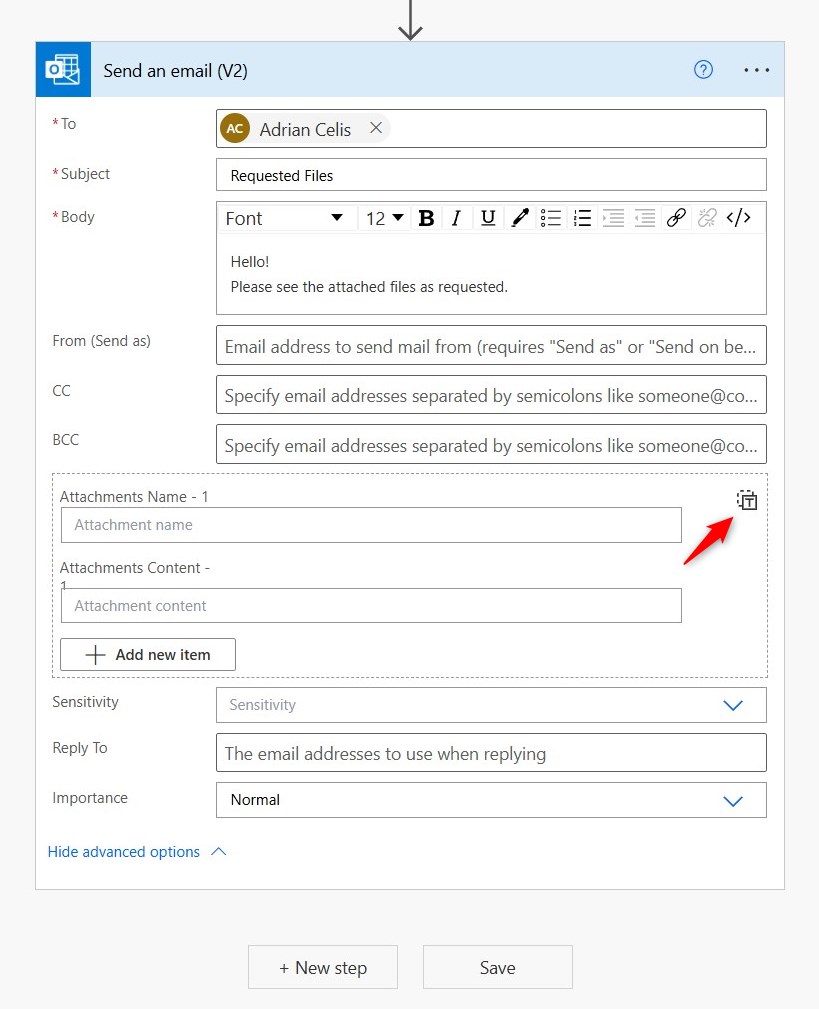
Step 9:
On the same action (Send an email (V2)’), Click on the ‘Switch to input array’ button. This will convert the section from a list of items into one field to input the array.
Step 10: Send an Email – Attachments
Step 10:
Inside the attachments field, insert a dynamic content using the variable named varAttachmentsArray:
Attachments

Conclusion
Save and test the flow. Once the run is successful, you should receive an email containing the two attachments from your SharePoint library list.
Did this article help? Let us know how we can improve. Send us a message by clicking the “Contact Us” button below.
Article last updated on May 22, 2025
Need expert guidance on Power Apps?


