Power Apps/ Automate – Leave Request App: First to Approve
22 steps
Overview
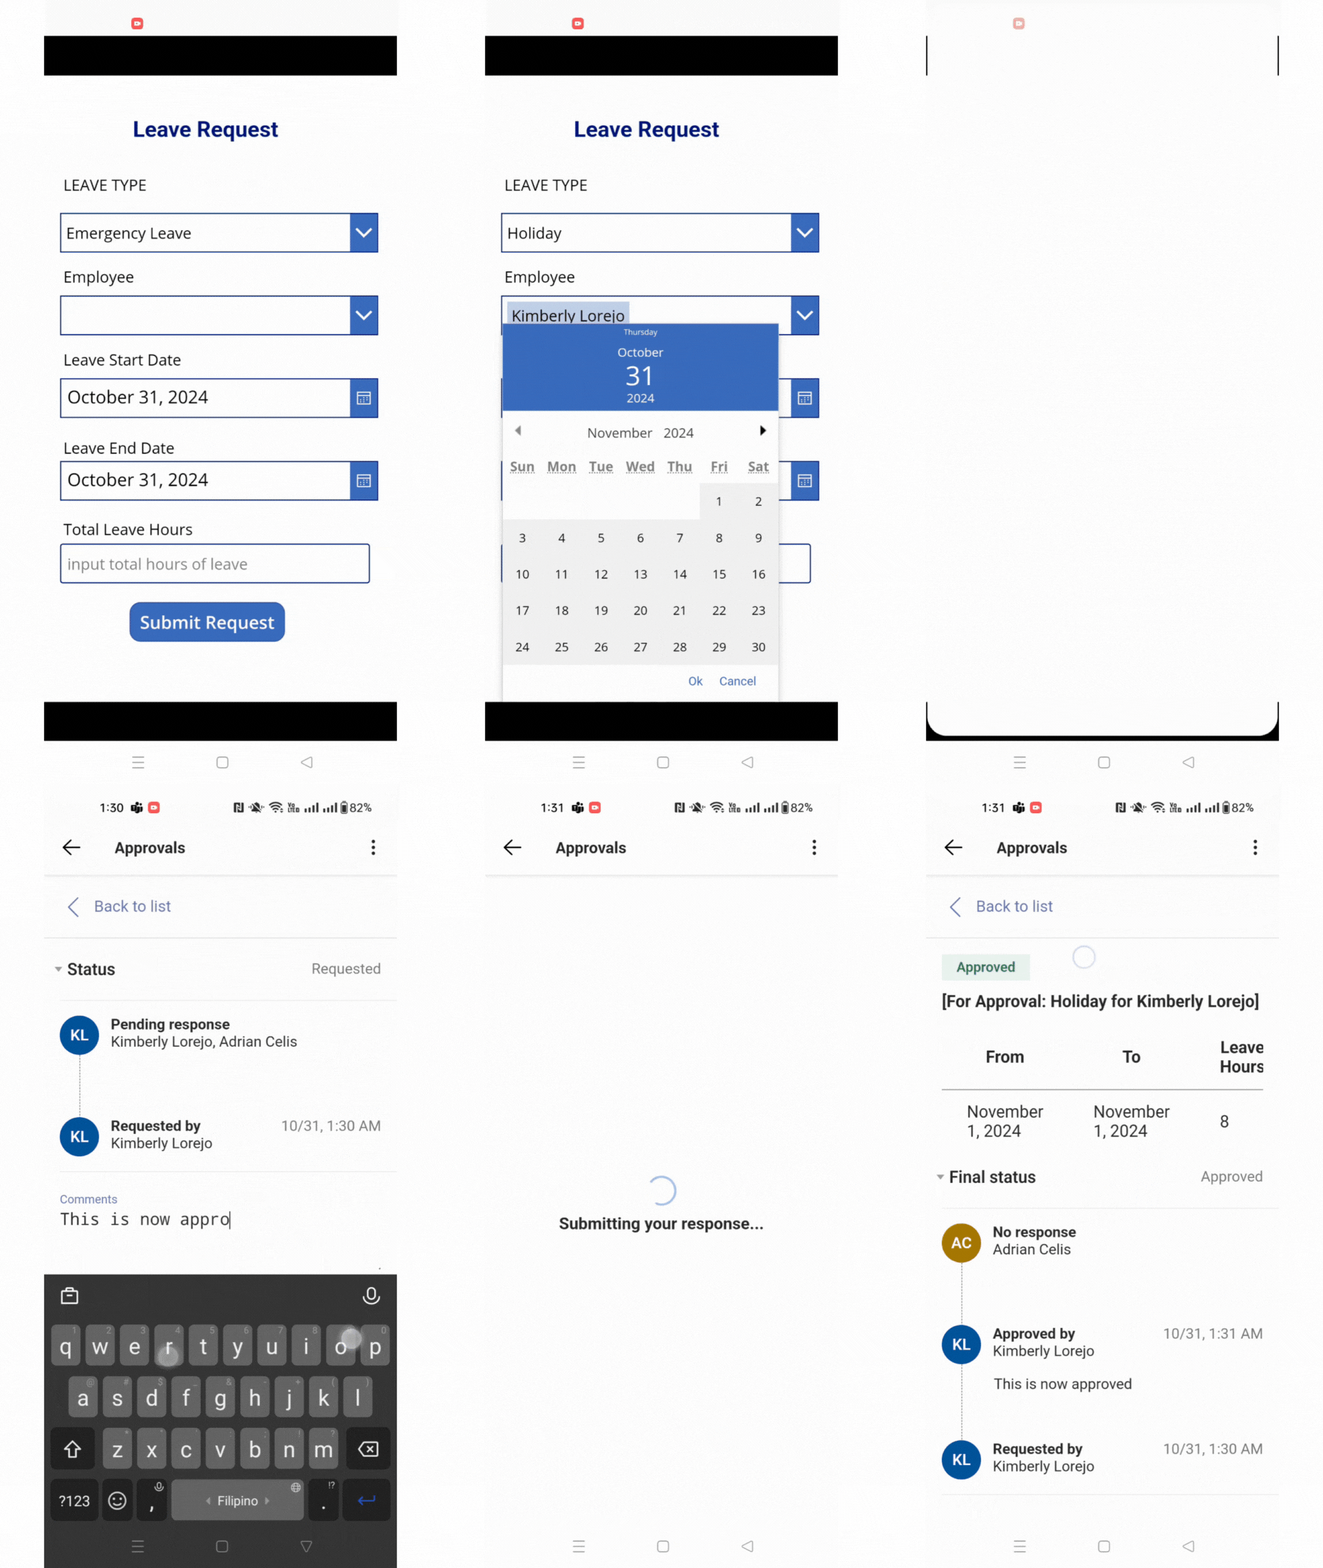
All business do people accounting and under different cirmcumstances, supervisors or other assigned employees might be delegated to raised a leave request on behalf of other employees.
On this tutorial, we will learn how to build a leave request app where employee can have multiple assigned approvers but only requires one approval for the request to be approved.
No database (SharePoint/Dataverse) is integrated on this solution as we track the approval proccess through MS Teams or email. This will be done through Power Automate.
Step 1: Leave Request Header

Step 1:
Insert a label control and name it Label1. Change the following properties
Text property
"Leave Request"Font property
Font.ArialSize property
30Color property
RGBA(0, 18, 107, 1)FontWeight property
FontWeight.BoldStep 2: Leave Type Label Control
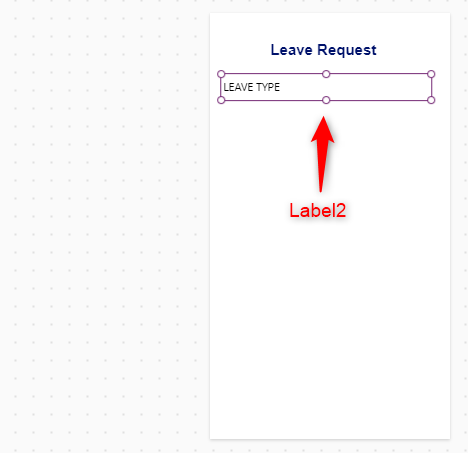
Step 2:
Insert a label control and name it Label2. Change the following properties
Text property
"LEAVE TYPE"Step 3: Types of Leave
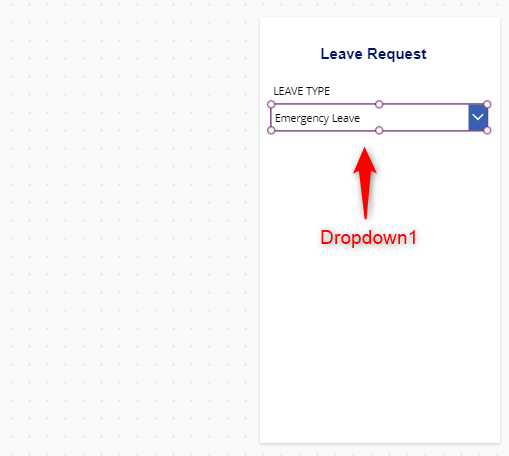
Step 3:
Insert a Dropdown control and name it Dropdown1. Change the following properties
Items property
Sort(["Vacation Leave",
"Holiday",
"Sick Leave",
"Emergency Leave",
"Maternity Leave",
"Paternity Leave",
"Unpaid Leave"],Value,SortOrder.Ascending)
Step 4: Employee Label Control
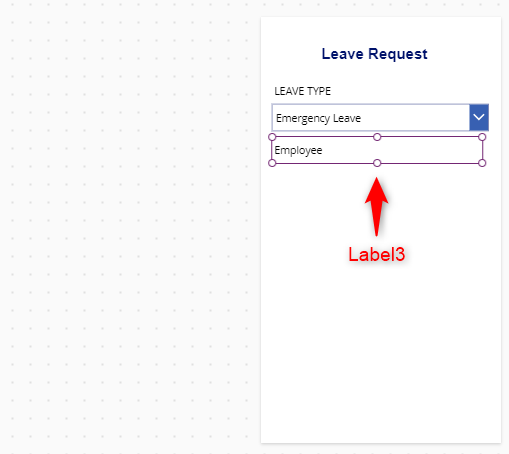
Step 4:
Insert a label control and name it Label3. Change the following properties
Text property
"Employee"Step 5: Employee and Approver List
Step 5:
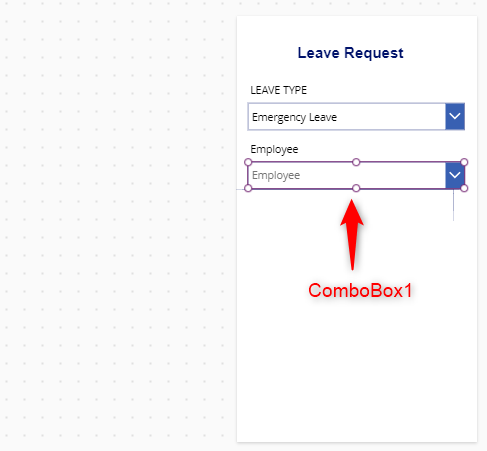
Insert a ComboBox control and name it ComboBox1. Change the following properties
Items property
Table(
{
Employee:"[insert employee 1 email here]",
Approver: "[insert 1st approver email for employee 1];
[insert 2nd approver email for employee 1]",
'Employee Display Name': "[insert employee 1 display name here]"
},

{Employee:"[insert employee 2 email here]",
Approver: "[insert approver email for employee 2]",
'Employee Display Name': "insert employee 2 display name here"
}

)
SelectMultiple property
falseDisplayFields property
["Employee Display Name"]InputTextPlaceholder property
"Employee"Step 6: Leave Start Date Label
Step 6:
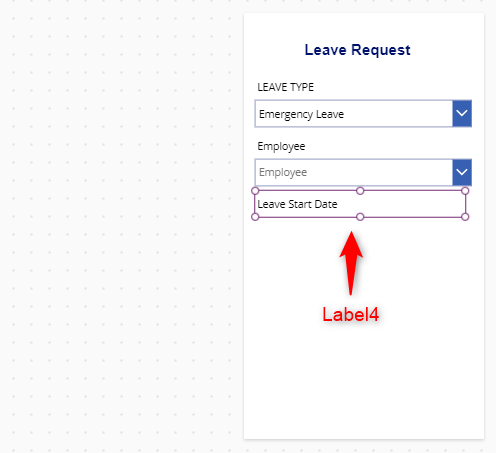
Insert a label control and name it Label4. Change the following properties
Text property
"Leave Start Date"Step 7: Leave Start Date Picker Control
Step 7:
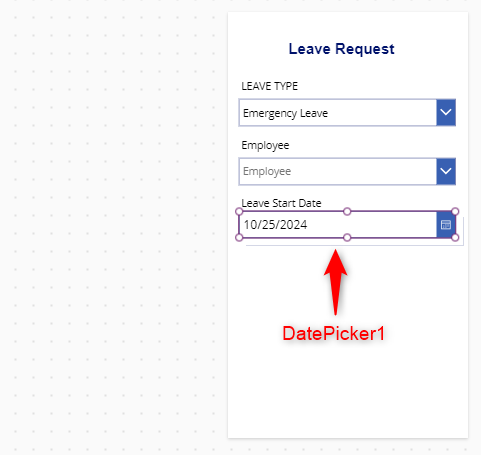
Insert a DatePicker control and name it DatePicker1.
Step 8: Leave End Date Label Control
Step 8:
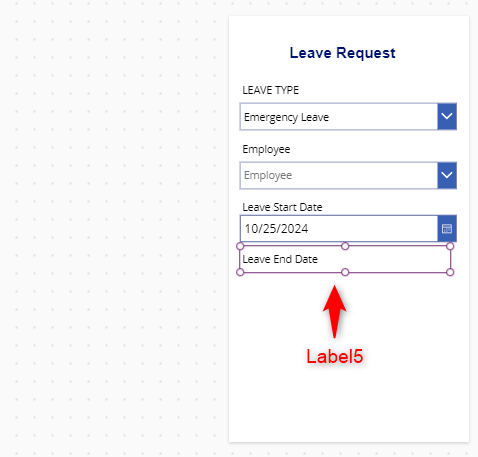
Insert a label control and name it Label5. Change the following properties
Text property
"Leave End Date"Step 9: Leave End Date Picker Control
Step 9:
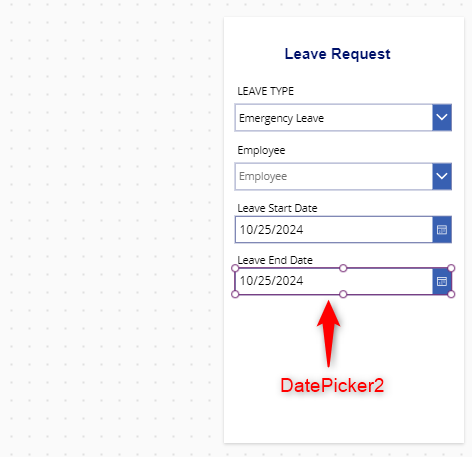
Insert a DatePicker control and name it DatePicker2.
Step 10: Total Leave Hours Label Control
Step 10:
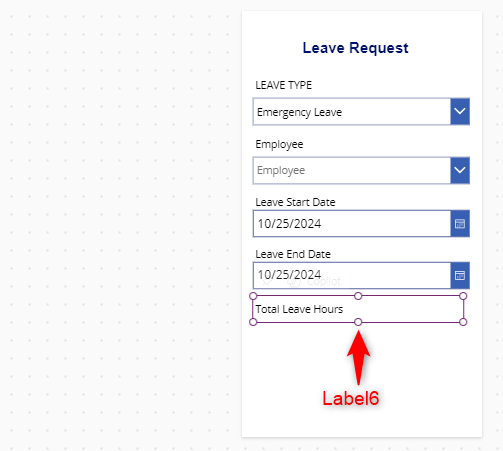
Insert a label control and name it Label6. Change the following properties
Text property
"Total Leave Hours"Step 11: Total Leave Hours TextInput Control
Step 11:
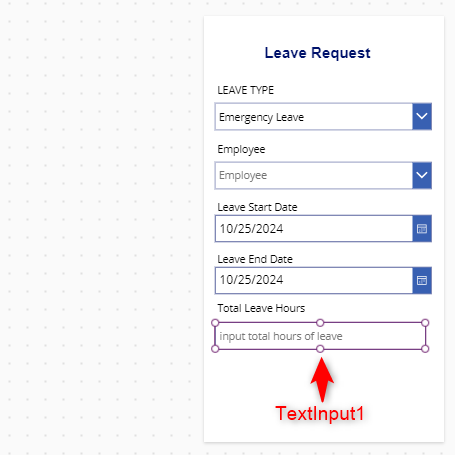
Insert a TextInput control and name it TextInput1. Change the following properties
Default property
""HintText property
"input total hours of leave"Format property
TextFormat.NumberStep 12: Submit Request Button
Step 12:
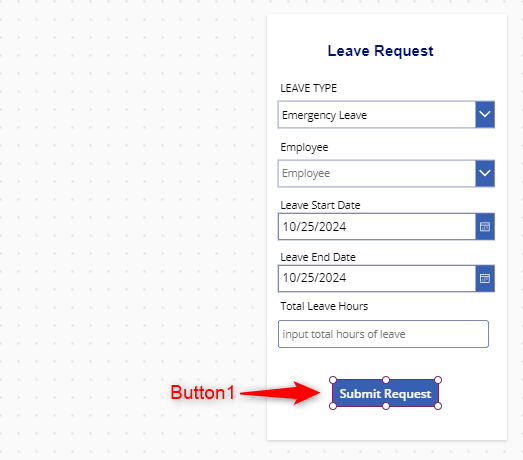
Insert a Button control and name it Button1. Change the following properties
Text property
"Submit Request"OnSelect property
Set(varApprovers,ComboBox1.Selected.Approver);

flow_single_approval.Run
(
    ComboBox1.Selected.Employee,
    varApprovers,
    Dropdown1.Selected.Value,
    TextInput1.Text,
    Text(DatePicker1.SelectedDate,DateTimeFormat.ShortDate),
    Text(DatePicker2.SelectedDate,DateTimeFormat.ShortDate),
    ComboBox1.Selected.'Employee Display Name'
);

Notify(
    "Your request for " &
    Dropdown1.Selected.Value &
    " is now for Approval",
    NotificationType.Success
    );
Note: It will prompt an error since we have not created the flow yet. Ignore the error and let us proceed on creating the flow on the next steps.
Step 13: Add Power Automate flow on Canvas App
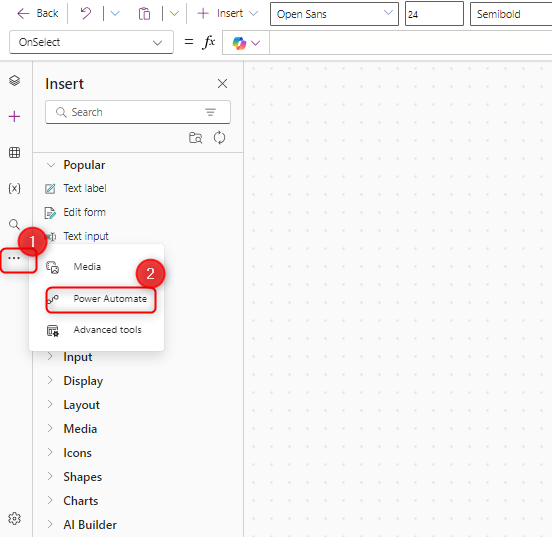
Step 13:
Add Power Automate flow on Canvas App by doing the following:
- From the left side bar, click the ellipsis
- Choose Power Automate
Step 14: Create a flow from blank
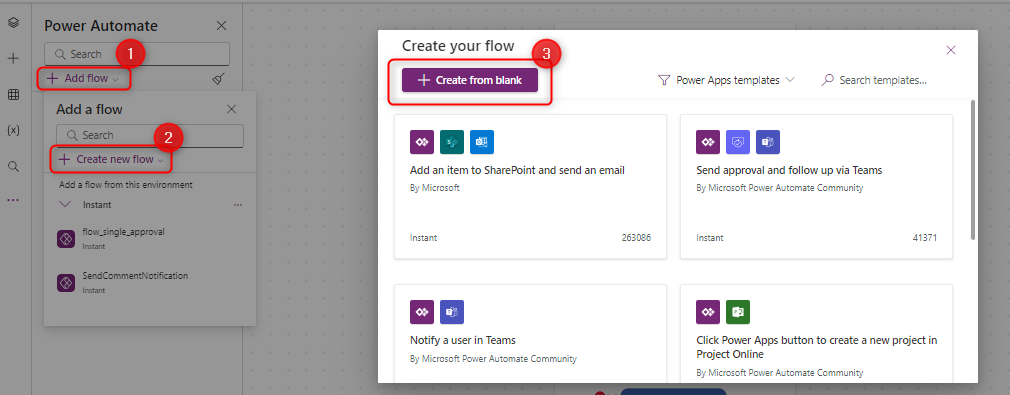
Step 14:
Create a flow from blank by doing the following:
- On the Power Automate section, select Add flow.
- Choose Create new flow. Create your flow dialog box will appear.
- Select Create from blank.
Step 15: Renaming the flow
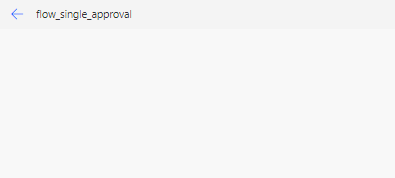
Step 15:
Rename the flow to flow_single_approval
Step 16: Add User Input
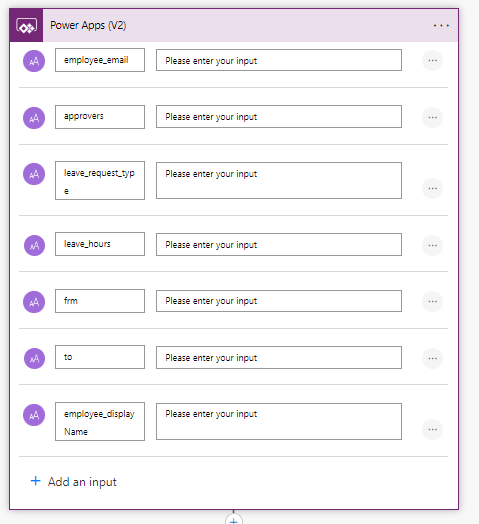
Step 16:
Click Add an input, Choose Text and type the following name of inputs below:
User Inputs
employee_emailapproversleave_request_typeleave_hoursfrmtoemployee_displayNameStep 17: New Step [Start and wait for an approval]
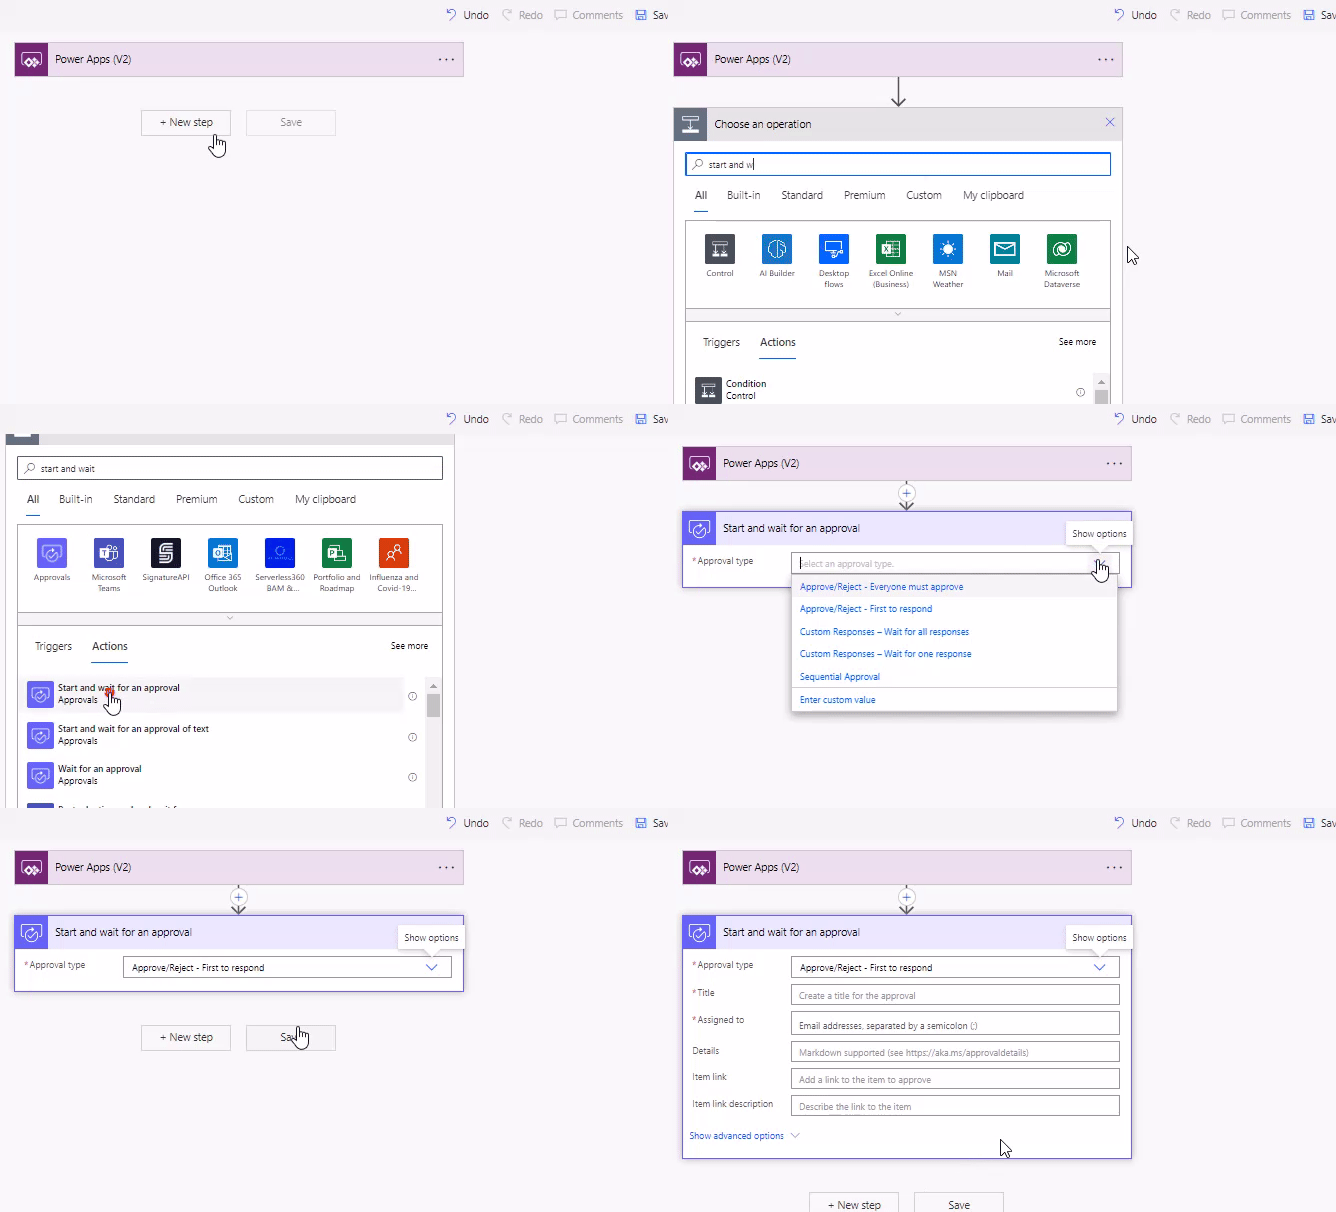
Step 17:
Click New Step, then search and choose Start and wait for an approval. For the Approval type, Choose Approve/Reject: First to respond.
Step 18: Start and wait for an approval contents.
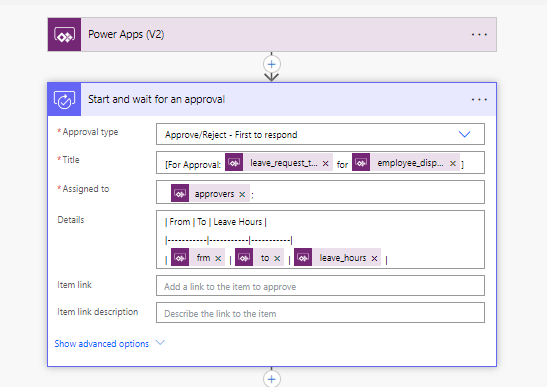
Step 18:
Apply the following contents:
Title
[For Approval: @{triggerBody()['text_2']} for @{triggerBody()['text_6']}]Assigned to

Details
| From | To | Leave Hours |
|-----------|-----------|-----------|
| @{triggerBody()['text_4']} | @{triggerBody()['text_5']} | @{triggerBody()['text_3']} |
Step 19: New Step [Condition]
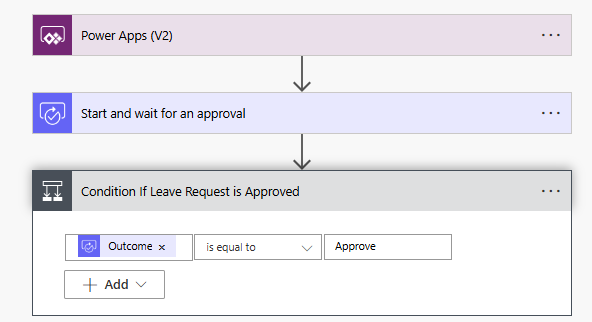
Step 19:
Click New Step, then search and choose Condition. Apply the following contents on the Condition Step:

Proceed with the next steps for if yes and if no condition.
Step 20: [Condition, “Yes” branch: Send an email (V2) contents]
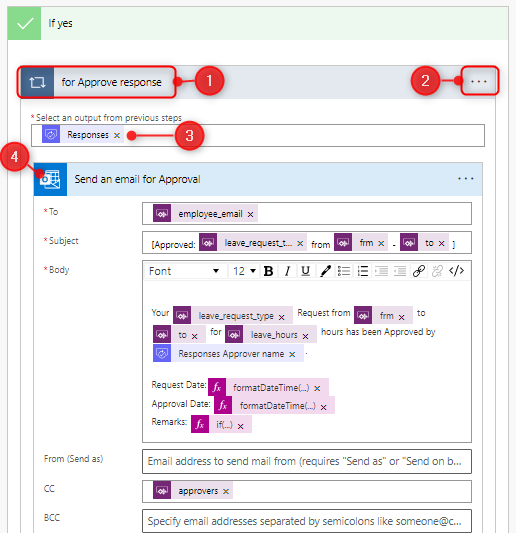
Step 20:
Apply the following steps on the Yes Condition branch
- Add an action Apply to each inside the if yes condition.
- Rename the loop by clicking the ellipsis, for Approve response
- Add dynamic content Responses
- Add an action, Send an email (V2) and apply below contents
To

Subject
[Approved: @{triggerBody()['text_2']} from
@{triggerBody()['text_4']} - @{triggerBody()['text_5']} ]
Body
Your @{triggerBody()['text_2']} Request from @{triggerBody()['text_4']} to
@{triggerBody()['text_5']} for @{triggerBody()['text_3']} hours has been
Approved by @{items('for_Approve_response')?['responder/displayName']}.

Request Date:@{formatDateTime(items('for_Approve_response')?
['requestDate'],'D')}
Approval Date: @{formatDateTime(items('for_Approve_response')?
['responseDate'],'D')}
Remarks: @{if(empty(items('for_Approve_response')?
['comments']),'NA',items('for_Approve_response')?['comments'])}
CC

Step 21: [Condition, “No” branch: Send an email (V2) contents]
Step 21:
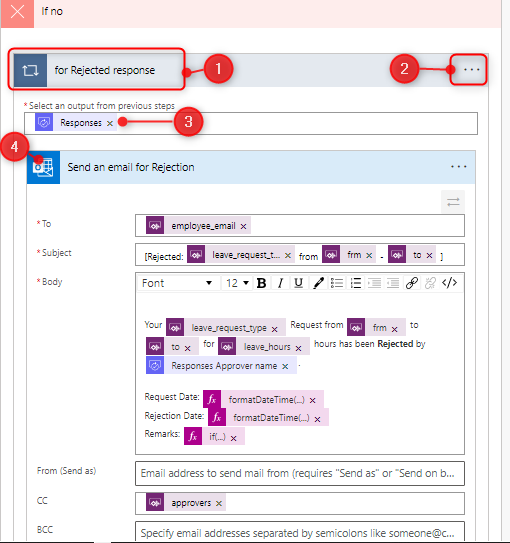
Apply the following steps on the No Condition branch
- Add an action Apply to each inside the if no condition.
- Rename the loop by clicking the ellipses, for Rejected response
- Add dynamic content Responses
- Add an action, Send an email (V2) and apply below contents
To
@{triggerBody()['text']}Subject
[Rejected: @{triggerBody()['text_2']} from
@{triggerBody()['text_4']} - @{triggerBody()['text_5']} ]
Body
Your @{triggerBody()['text_2']} Request from @{triggerBody()['text_4']} to
@{triggerBody()['text_5']} for @{triggerBody()['text_3']} hours has been
Rejected by @{items('for_Rejected_response')?['responder/displayName']}.

Request Date: @{formatDateTime(items('for_Rejected_response')?
['requestDate'],'D')}
Rejection Date: @{formatDateTime(items('for_Rejected_response')?
['responseDate'],'D')}
Remarks: @{if(empty(items('for_Rejected_response')?
['comments']),'NA',items('for_Rejected_response')?['comments'])}
CC
@{triggerBody()['text_1']}Step 22: Save and Test the flow
Step 22:
Do the following steps to complete the flow.
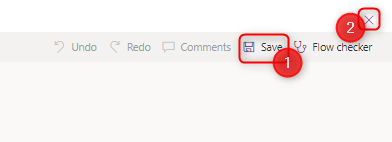
- Save the flow by clicking the save button.
- Close the flow. You will be directed to canvas app.
Conclusion

Conclusion:
Test the flow by accessing the Leave Request App, providing all the needed information, and clicking the Submit Button. The approvers will then receive the leave request through MS Teams/email.
It will only require one approver to either Approve/Reject the request.
An email will be sent to the employee for the approval response, and all approvers will be copied.
Did this article help? Let us know how we can improve. Send us a message by clicking the “Contact Us” button below.
Article last updated on November 6, 2024
Need expert guidance on Power Apps?