Power Apps – Bulk Updates in a Gallery
8 steps
Overview

Having the feature of bulk updates is a common requirement in Power Apps projects. This blueprint will demonstrate an example of a to do list with checkboxes. Ticking multiple checkboxes and clicking a button will apply to all ticked items.
Our Set-up
![]() SharePoint list named Construction Project Tasks
SharePoint list named Construction Project Tasks
Note: The ‘Done’ column is a Yes/No type.
Step 1: Set OnStart

Step 1:
Select the App object in the Tree View pane. Change the following properties:
OnStart
ClearCollect(collConstructionTasks,'Construction Project Tasks')Note: If you encounter an error, make sure you have connected the ‘Construction Project Tasks’ SharePoint list as the app’s data source.
Step 2: Run OnStart
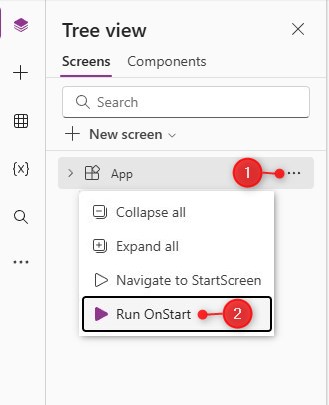
Step 2:
Do the following:
- Select the ellipsis (three dots) of the App object in the Tree View pane.
- Select Run OnStart
By doing this the collection with our Construction Project data is now created. For information on how to check the contents of a collection, click here.
Step 3: Insert Container

Step 3:
On the canvas, insert a container and name it Container1. Adjust the size to make it into a small height and wide width rectangle. Change the following properties:
BorderColor
RGBA(106, 122, 127, 1)BorderThickness
1DropShadow
DropShadow.NoneStep 4: Insert ‘Select All’ Checkbox

Step 4:
Insert a modern checkbox inside Container1 and name it CheckboxCanvas1. Change the following properties:
CheckboxSize
24Label
"Select All"Step 5: Insert ‘Mark As Done’ Button
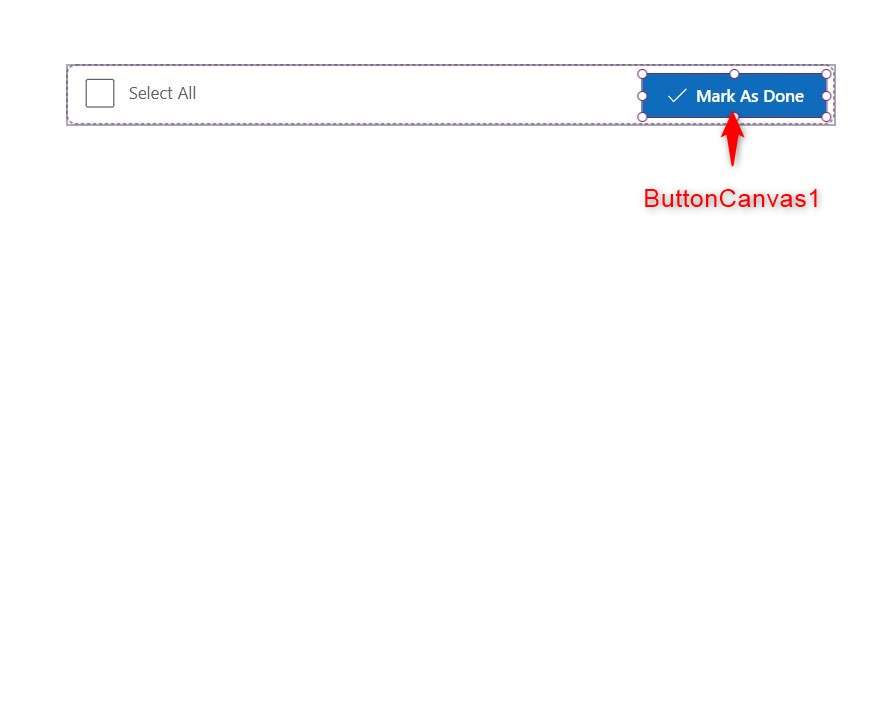
Step 5:
Insert a modern button inside Container1 and name it ButtonCanvas1. Change the following properties:
Icon
"Checkmark"Text
"Mark As Done"OnSelect
ForAll(
    Filter(
        Gallery1.AllItems,
        CheckboxCanvas2.Checked
    ) As CheckedItem,
    Patch(
        collConstructionTasks,
        CheckedItem,
        {Done: true}
    )
);
Reset(CheckboxCanvas1);
Patch('Construction Project Tasks',collConstructionTasks);

ClearCollect(collConstructionTasks,
'Construction Project Tasks');
Note: There will be an error in the OnSelect property for now. This should disappear when we insert the gallery in Step 7 and the checkbox in Step 8.
Step 6: Insert ‘Mark As Undone’ button
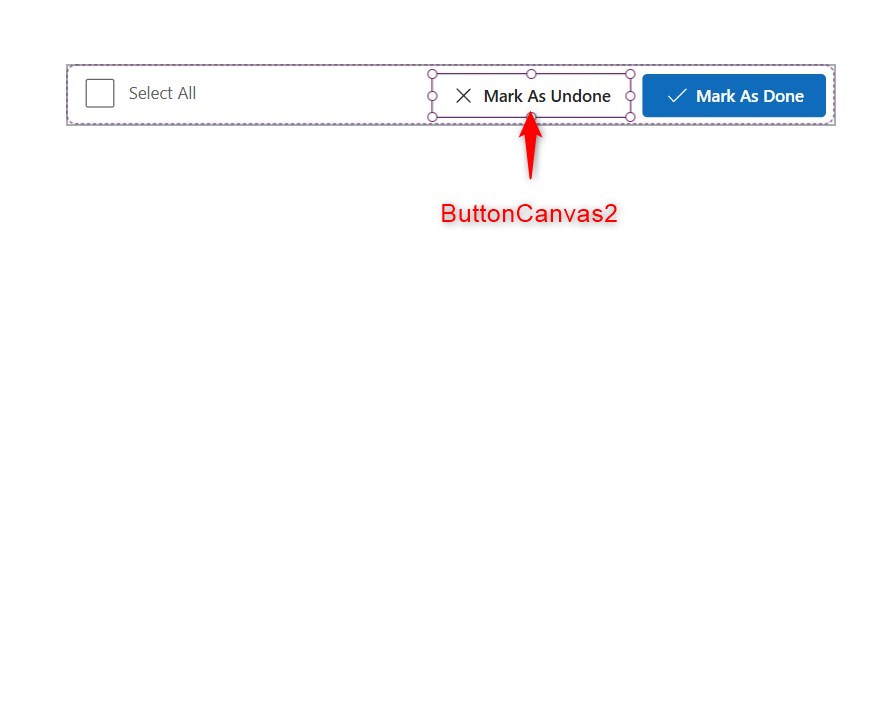
Step 6:
Insert another modern button inside Container1 and name it ButtonCanvas2. Change the following properties:
Appearance
'ButtonCanvas.Appearance'.SecondaryIcon
"Dismiss"Text
"Mark As Undone"OnSelect
ForAll(
    Filter(
        Gallery1.AllItems,
        CheckboxCanvas2.Checked
    ) As CheckedItem,
    Patch(
        collConstructionTasks,
        CheckedItem,
        {Done: false}
    )
);
Reset(CheckboxCanvas1);

Patch('Construction Project Tasks',collConstructionTasks);

ClearCollect(collConstructionTasks,
'Construction Project Tasks');
Note: There will be an error in the OnSelect property for now. This should disappear when we insert the gallery in Step 7 and the checkbox in Step 8.
Step 7: Insert gallery
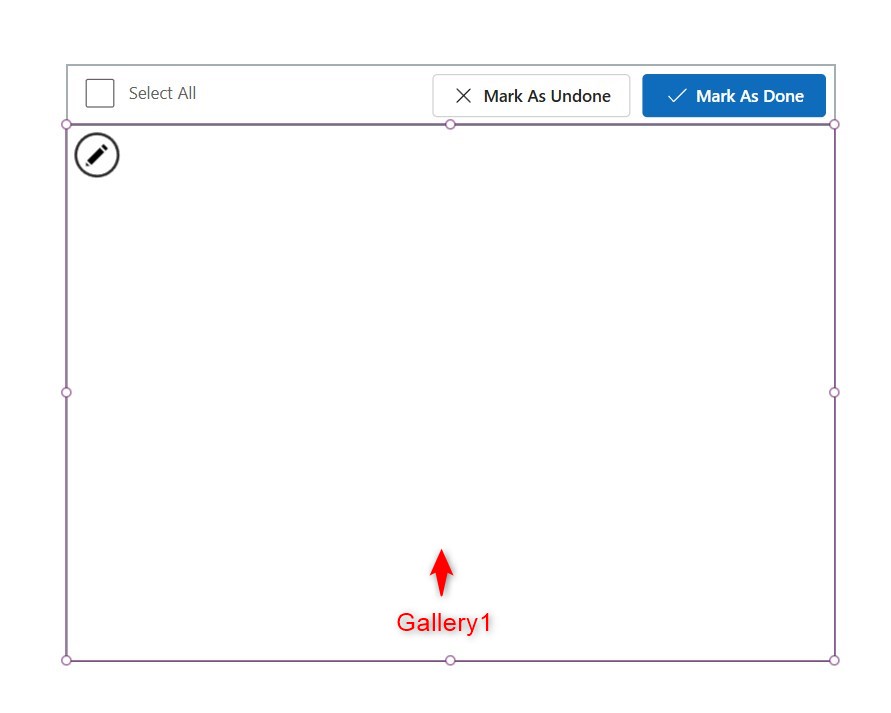
Step 7:
Insert a blank vertical gallery and name it Gallery1. Make it the same width and place it adjacent to Container1. Change the following properties:
TemplateSize
45BorderColor
RGBA(106, 122, 127, 1)BorderThickness
1Items
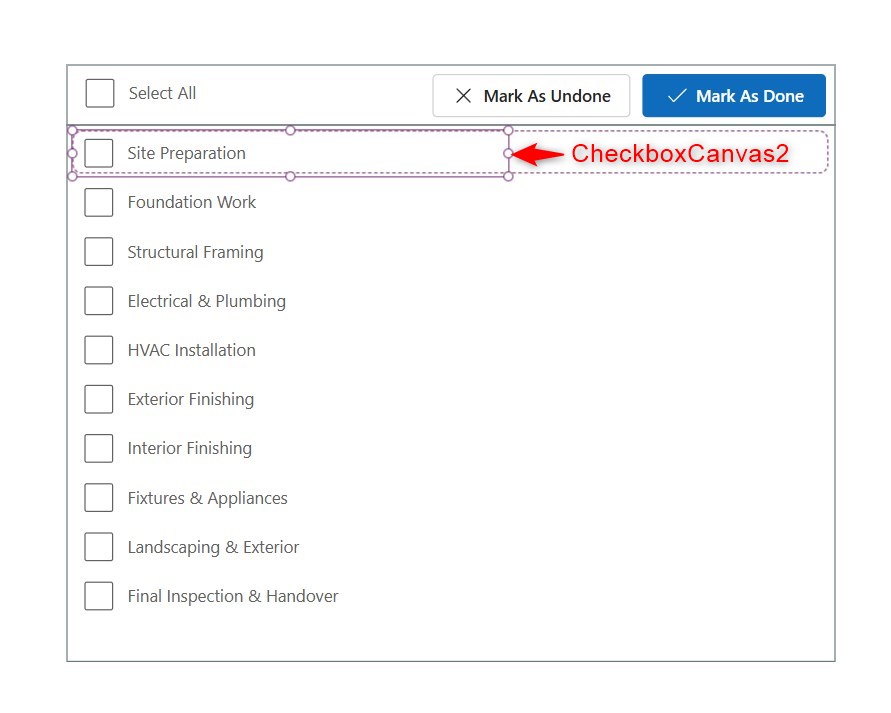
collConstructionTasksStep 8: Insert checkbox inside gallery
Conclusion

To test the app, hit play mode and check some boxes in the gallery then click on the ‘Mark As Done’ button. You will notice the items get an indication that the task is done. This is also saved in the SharePoint list. Then try clicking the ‘Select all’ checkbox and click the ‘Mark As Undone’ button. You will notice that all tasks has returned to its default status.
This is the concept of bulk updating using galleries and checkboxes. You may use this for other use-cases such as generating documents, deleting items, or selection processes.
Did this article help? Let us know how we can improve. Send us a message by clicking the “Contact Us” button below.
Article last updated on March 19, 2025
Need expert guidance on Power Apps?