Power Apps – How to create a responsive popup message box
14 steps
Introduction:
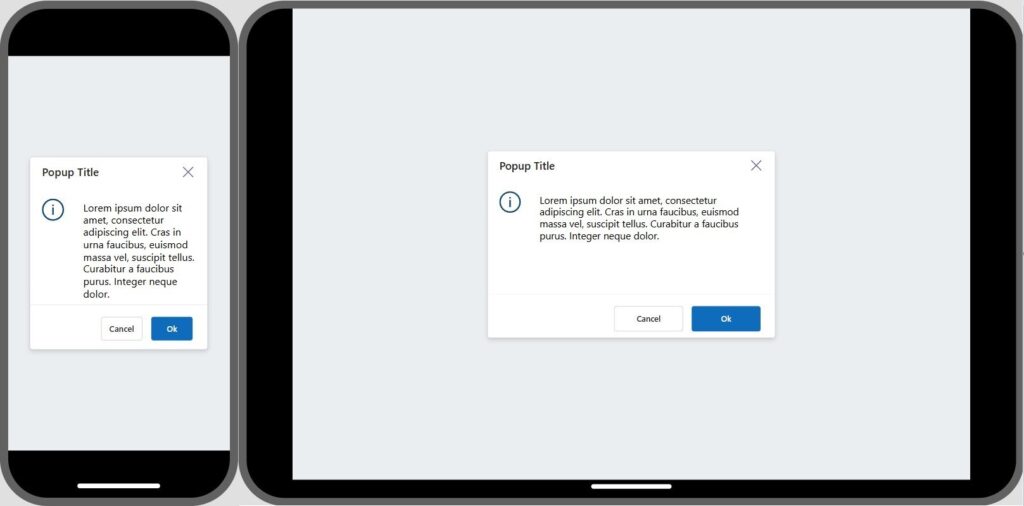
We will learn how to create a popup box when a button is clicked. Additionally, we will make this responsive (size automatically adjusts on different devices).
Note: We will use a screen named Screen1 to do our popup.

Step 1:
Insert a horizontal container named Container1. Change the following properties:
X property
0Y property
0Height property
Parent.HeightWidth property
Parent.WidthLayoutJustifyContent property
LayoutJustifyContent.CenterLayoutAlignItems property
LayoutAlignItems.CenterFill property
RGBA(214, 221, 224, 0.5)Note: You should now have a container that covers the whole screen
Step 2:
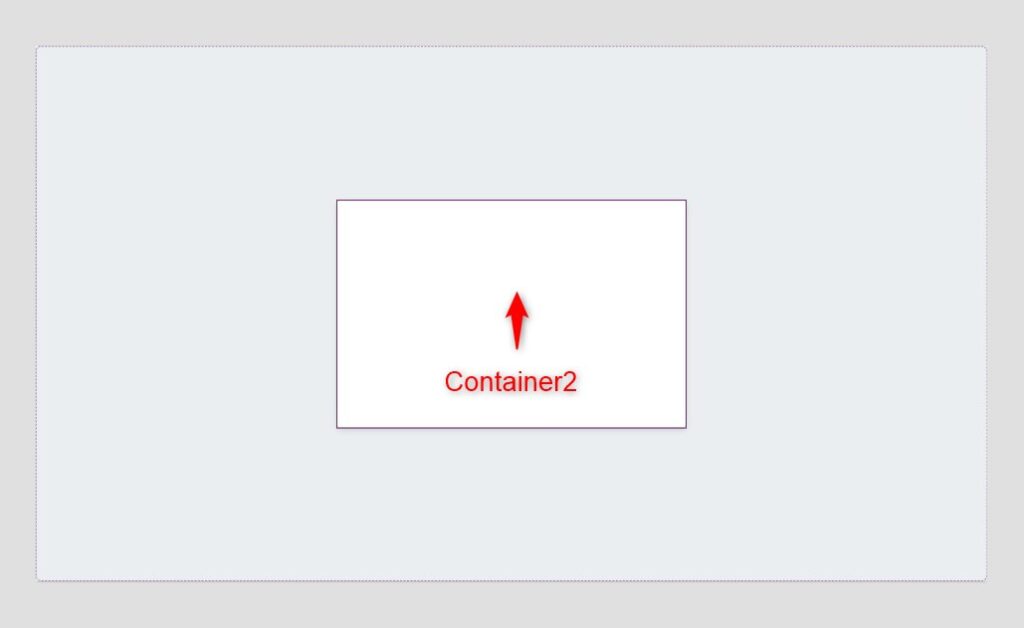
Insert a vertical container inside Container1 and name it Container2. Change the following properties:
FillPortions property
0AlignInContainer property
AlignInContainer.SetByContainerHeight property
325Width property
If(Screen1.Size= ScreenSize.Small,300, 500)DropShadow property
DropShadow.RegularFill property
RGBA(255, 255, 255, 1)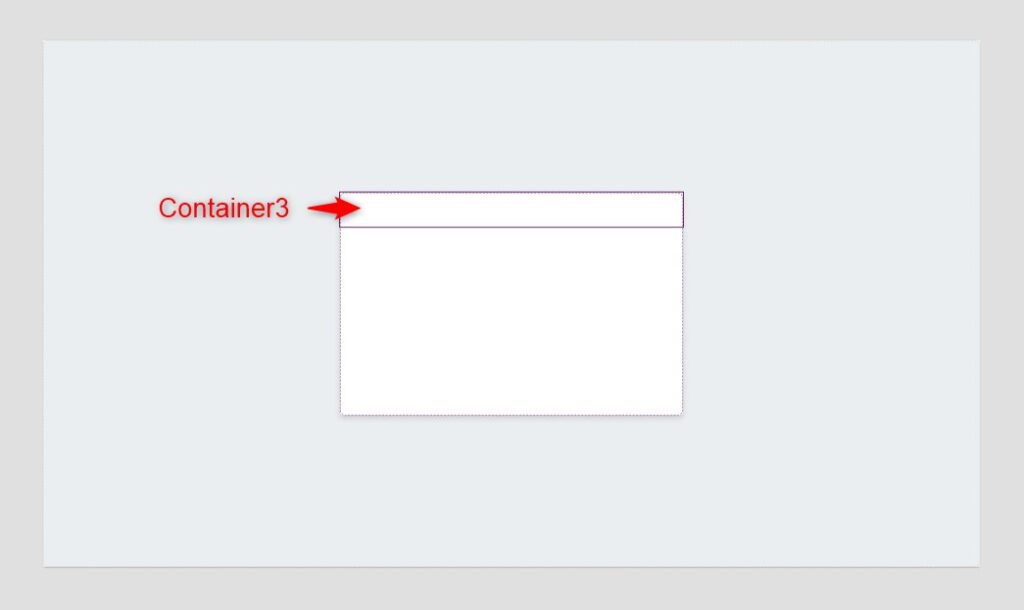
Step 3:
Insert a horizontal container inside Container2 and name it Container3. Change the following properties:
FillPortions property
0Height property
50PaddingLeft property
20PaddingRight property
20DropShadow property
DropShadow.None
Step 4:
Insert a horizontal container inside Container2 and name it Container4. Change the following properties:
FillPortions property
0Height property
200LayoutGap property
25LayoutOverflowY property
LayoutOverflow.ScrollDropShadow property
DropShadow.NonePaddingTop property
20PaddingLeft property
20PaddingRight property
20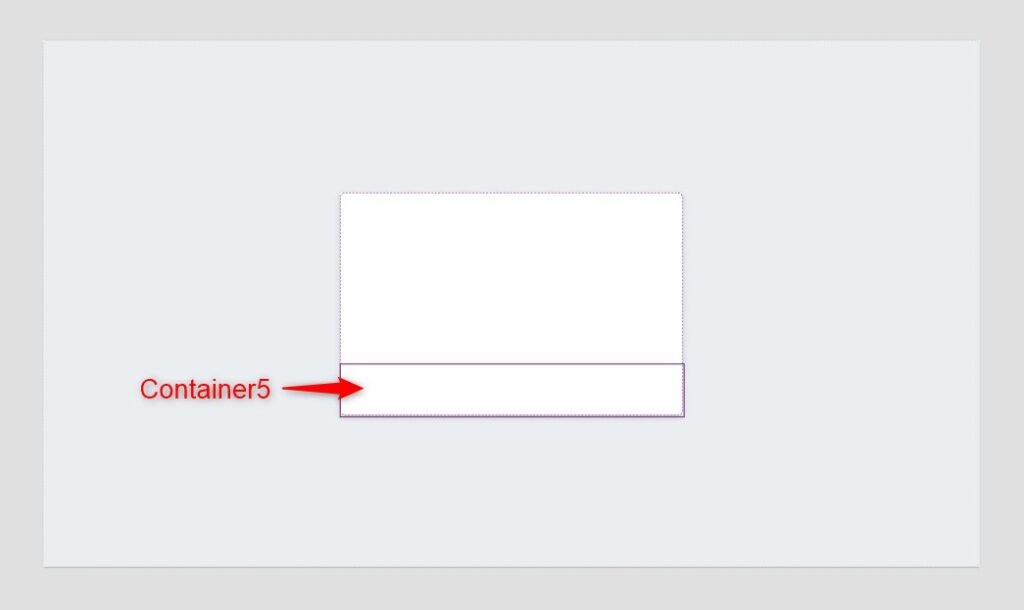
Step 5:
Insert a horizontal container inside Container2 and name it Container5. Change the following properties:
FillPortions property
0Height property
75LayoutJustifyContent property
LayoutJustifyContent.EndLayoutGap property
15DropShadow property
DropShadow.LightPaddingTop property
20PaddingRight property
25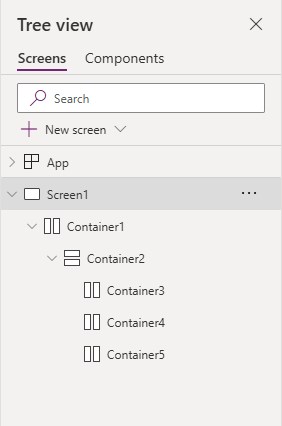
Review:
Your tree view should look like the one in the image provided.

Step 6:
Insert a label inside Container3 and name it Label1. Change the following properties:
Text property
"Popup Title"Height property
Parent.HeightWidth property
If(Screen1.Size = ScreenSize.Small,235,435)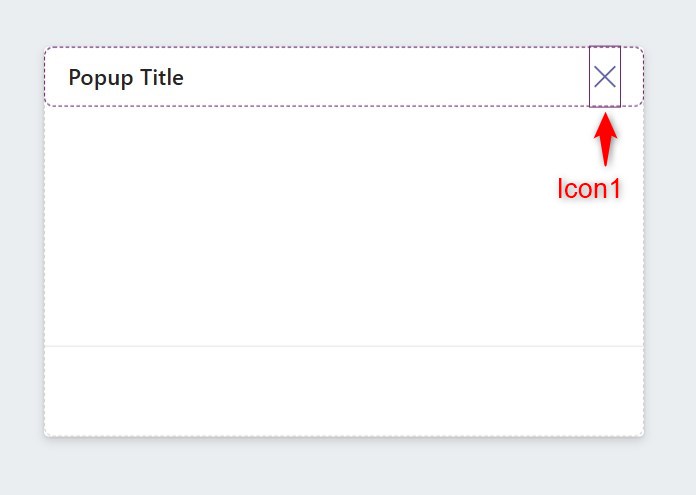
Step 7:
Insert an icon (cancel icon) inside Container3 and name it Icon1. Change the following properties:
Icon property
Icon.CancelHeight property
Parent.HeightWidth property
25OnSelect property
UpdateContext({varShowPopup:false});
Step 8:
Insert an icon (information) inside Container4 and name it Icon2. Change the following properties:
Icon property
Icon.InformationHeight property
40Height property
40DisplayMode property
DisplayMode.View
Step 9:
Insert a label inside Container4 and name it Label2. Change the following properties:
Text property
"Lorem ipsum dolor sit amet, consectetur
adipiscing elit. Cras in urna faucibus, euismod
massa vel, suscipit tellus. Curabitur a faucibus
purus. Integer neque dolor."
Width property
If(Screen1.Size = ScreenSize.Small,200,400)AutoHeight property
true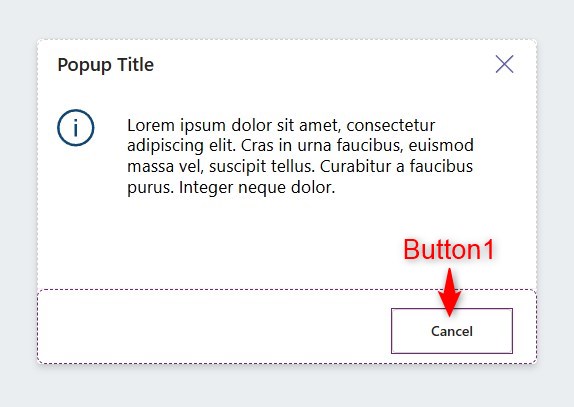
Step 10:
Insert a button (modern) inside Container5 and name it Button1. Change the following properties:
Text property
"Cancel"OnSelect property
UpdateContext({varShowPopup:false});Appearance property
'ButtonCanvas.Appearance'.Secondary
Step 11:
Insert a button (modern) inside Container5 and name it Button2. Change the following properties:
Text property
"Ok"OnSelect property
UpdateContext({varShowPopup:false});Appearance property
'ButtonCanvas.Appearance'.Primary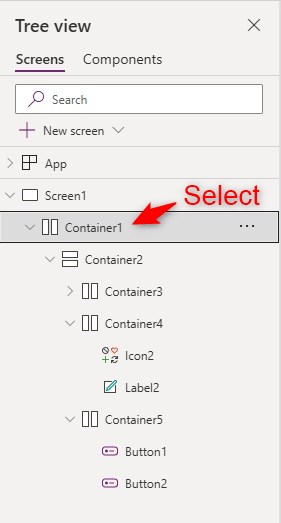
Step 12:
From the Tree View, select Container1. Change the following properties:
Visible property
varShowPopupAll of the control in the canvas should now be invisible for now.

Step 13:
On the canvas, insert a button (modern) named Button3. Change the following properties:
Text property
"Show Popup"OnSelect property
UpdateContext({varShowPopup:true});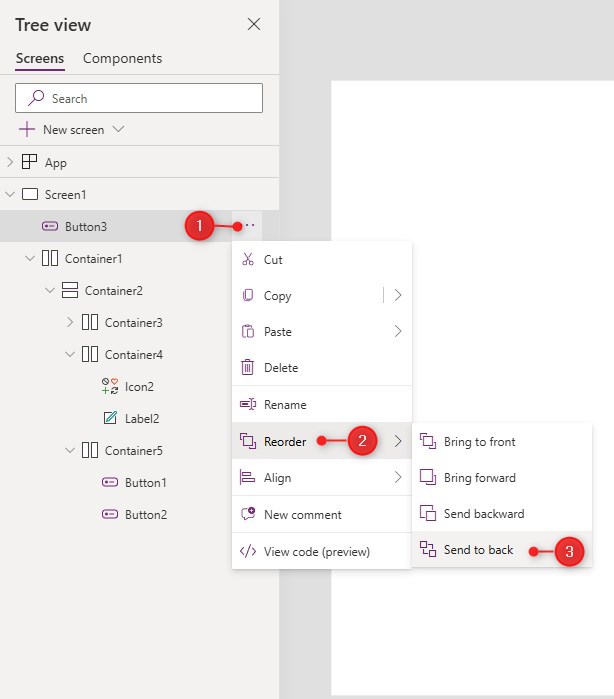
Step 14:
Send Button3 to the very back by doing the following:
- Click the ellipsis of Button3 in Tree View
- Click ‘Reorder’
- Click ‘Send to back’

Conclusion:
To test, activate play mode. Click on the ‘Show Popup button’. You will see that the popup appears when the button is clicked. From here, you can customize and add your actions in the buttons or the appearance of the popup.
Did this article help? Let us know how we can improve. Send us a message by clicking the “Contact Us” button below.
Article last updated on July 31, 2024
Need expert guidance on Power Apps?


