Power Apps – How to create an editable table
13 steps
Overview

This blueprint will show how to create a grid in canvas Power Apps, similar to a SharePoint list edit grid or an Excel spreadsheet. This lets you create, view, delete, and edit items in seamless fashion rather than using the out-of-the-box forms.
Our Set-up
![]() SharePoint list named Accounts Receivables
SharePoint list named Accounts Receivables
Note: Add this data source to the app.
Step 1: Set OnStart

Step 1:
Select the App object in the Tree View pane. Change the following properties:
OnStart
ClearCollect(
    collAccountsReceviables,
    AddColumns(
        'Account Receivables',
        IsDeleted,
        false
    )
)
Note: If you encounter an error, make sure you have connected the ‘Accounts Receivable’ SharePoint list as the app’s data source.
Step 2: Run OnStart
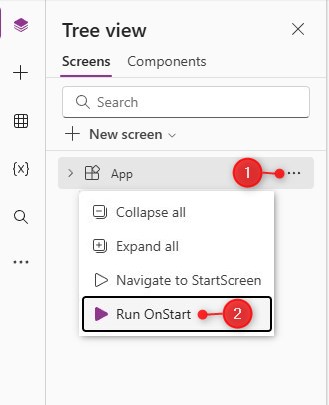
Step 2:
Do the following:
- Select the ellipsis (three dots) of the App object in the Tree View pane.
- Select Run OnStart
By doing this the collection with our Accounts Receivable data is now created. For information on how to check the contents of a collection, click here.
Step 3: Insert ‘New’ Button
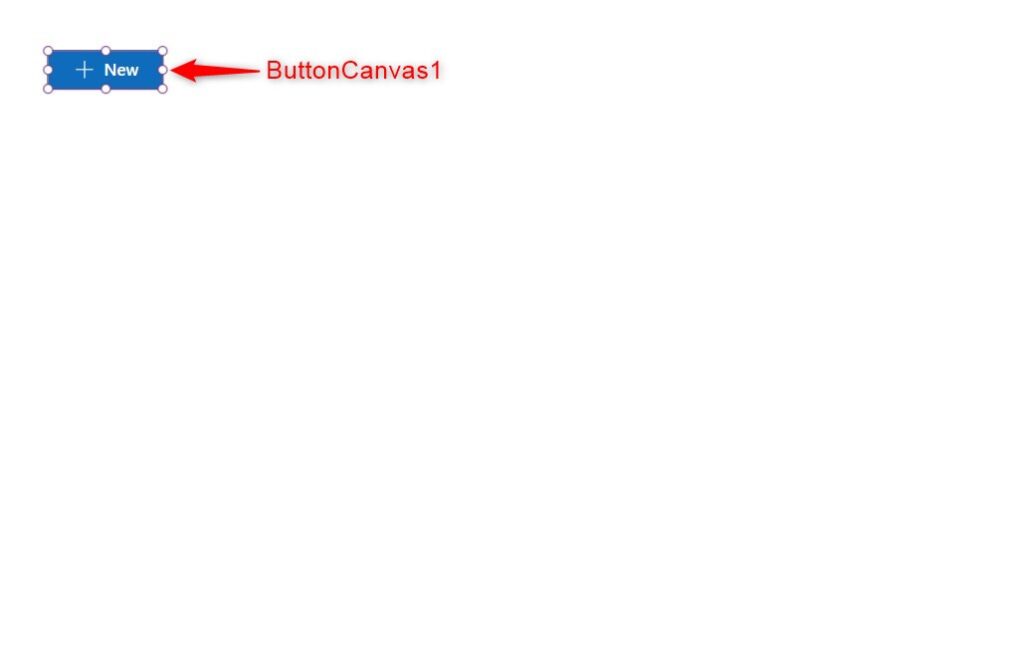
Step 3:
On the canvas, insert a button (modern) and name it ButtonCanvas1. Change the following properties:
Text
"New"Icon
"Add"OnSelect
Collect(collAccountsReceviables,
  {
    CompanyName:"",
    DueDate:Today(),
    Amount:0,
    IsDeleted:false
  }
);
Note: This button will create a new row in the grid.
Step 4: Insert ‘Save’ Button

Step 4:
Insert another button (modern) and name it ButtonCanvas2. Change the following properties:
Text
"Save"Icon
"Save"BasePaletteColor
RGBA(8, 222, 8, 1)OnSelect
//Remove All Deleted from list
Set(varDeletedRecords,
ForAll(Filter(collAccountsReceviables,IsDeleted) As CurrentItem,
Remove('Account Receivables',LookUp('Account Receivables',ID = CurrentItem.ID))
));

//Update All Changes
Set(varChangedRecords,
ForAll(Filter(collAccountsReceviables,!IsDeleted) As CurrentItem,
Patch('Account Receivables',
If(IsBlank(CurrentItem.ID),
Defaults('Account Receivables'),
LookUp('Account Receivables',ID = CurrentItem.ID)
),
{
    CompanyName:CurrentItem.CompanyName,
    DueDate:CurrentItem.DueDate,
    Amount:CurrentItem.Amount
}
)));

Notify("Saved successfully.",NotificationType.Success);
Note: This button will save all changes to the SharePoint site.
Step 5: Insert ‘Reset’ Button
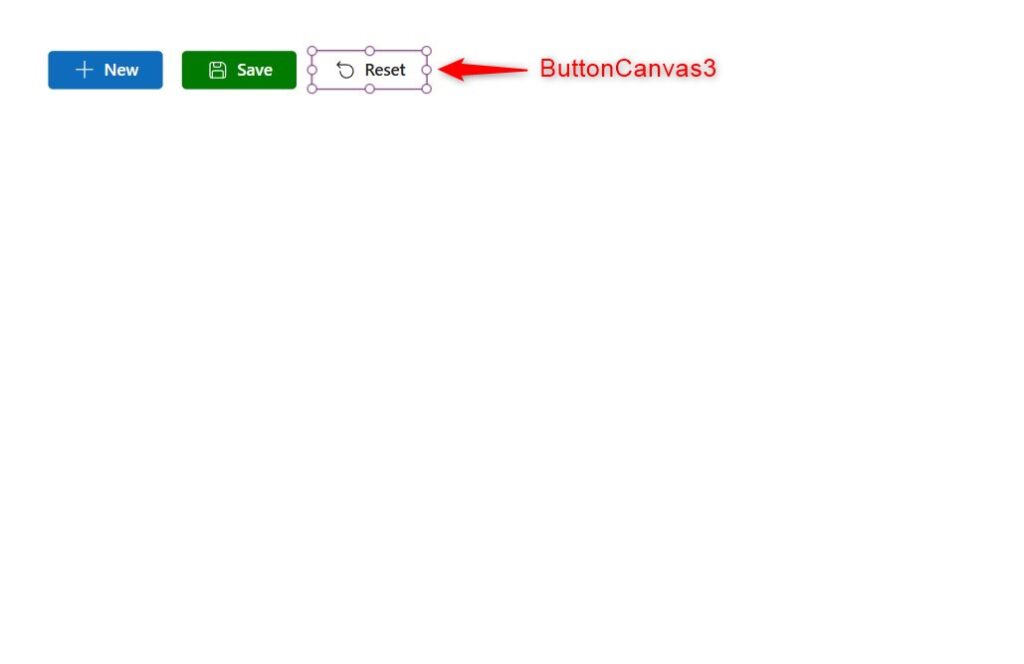
Step 5:
Insert another button (modern) and name it ButtonCanvas3. Change the following properties:
Text
"Reset"Icon
"ArrowReset"Appearance
'ButtonCanvas.Appearance'.SecondaryOnSelect
ClearCollect(
    collAccountsReceviables,
    AddColumns(
        'Account Receivables',
        IsDeleted,
        false
    )
)
Note: This button will reset any changes after the last save.
Step 6: Insert ‘Company Name’ label
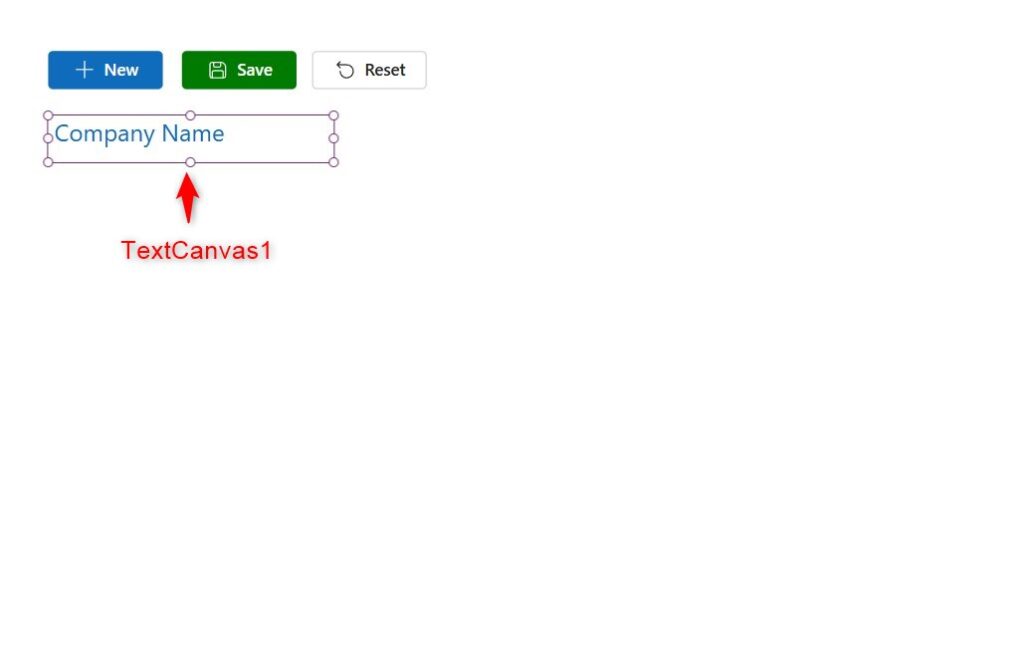
Step 6:
Insert a text (modern) and name it TextCanvas1. Change the following properties:
Text
"Company Name"Size
20Font Color
RGBA(15, 108, 189, 1)Step 7: Insert ‘Due Date’ label

Step 7:
Insert another text (modern) and name it TextCanvas2. Change the following properties:
Text
"Due Date"Size
20Font Color
RGBA(15, 108, 189, 1)Step 8: Insert ‘Amount’ label
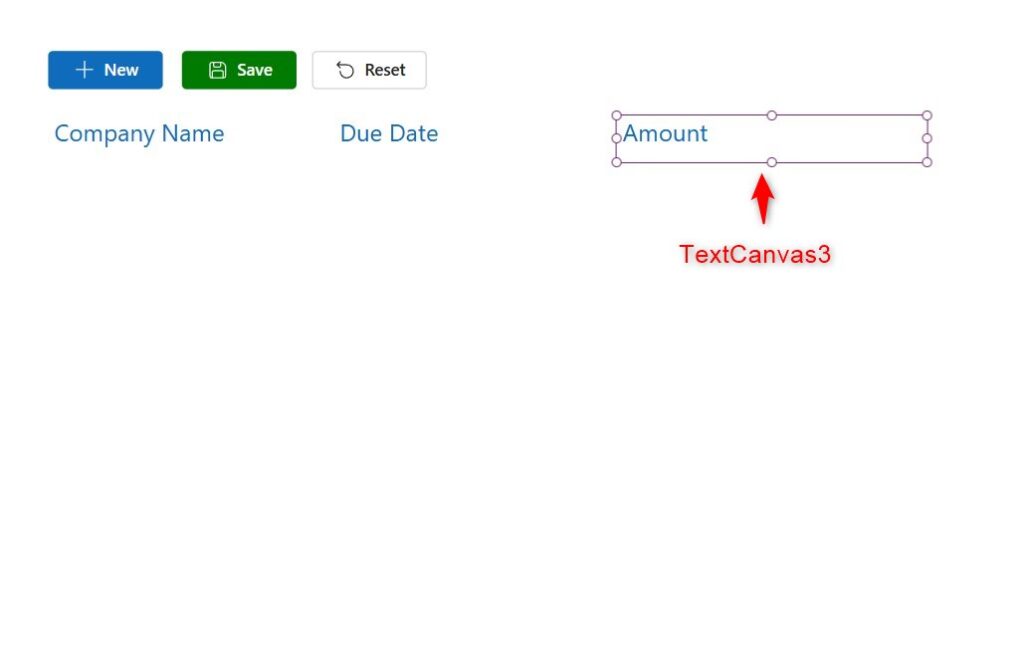
Step 8:
Insert another text (modern) and name it TextCanvas3. Change the following properties:
Text
"Amount"Size
20Font Color
RGBA(15, 108, 189, 1)Step 9: Insert Gallery
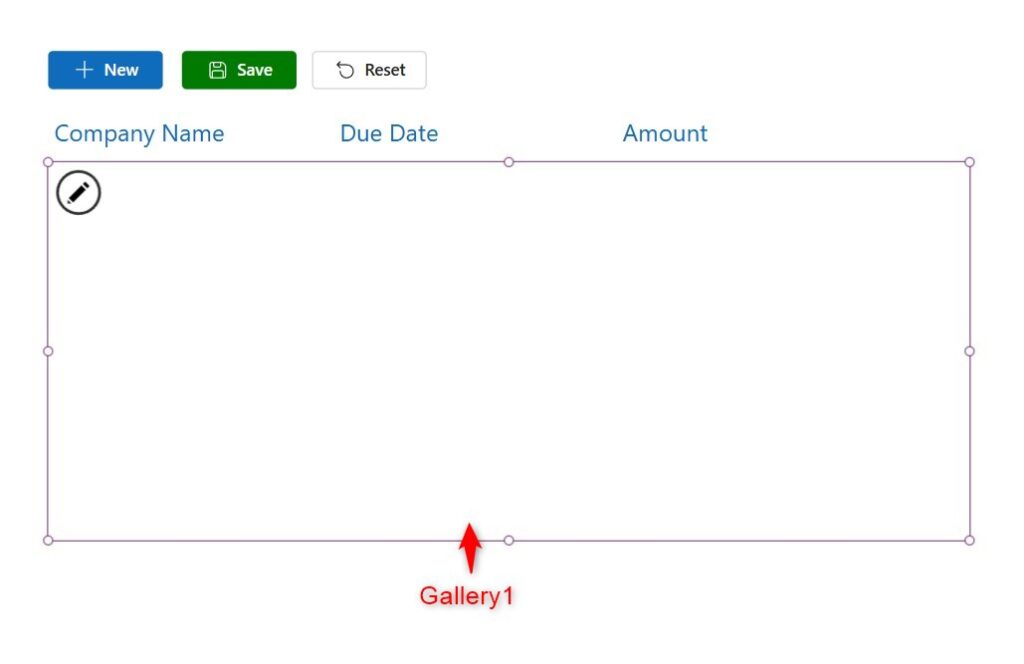
Step 9:
Insert a Blank Vertical Gallery and name it Gallery1. Change the following properties:
Items
Filter(collAccountsReceviables,!IsDeleted)TemplateSize
52Step 10: Insert Text Box

Step 10:
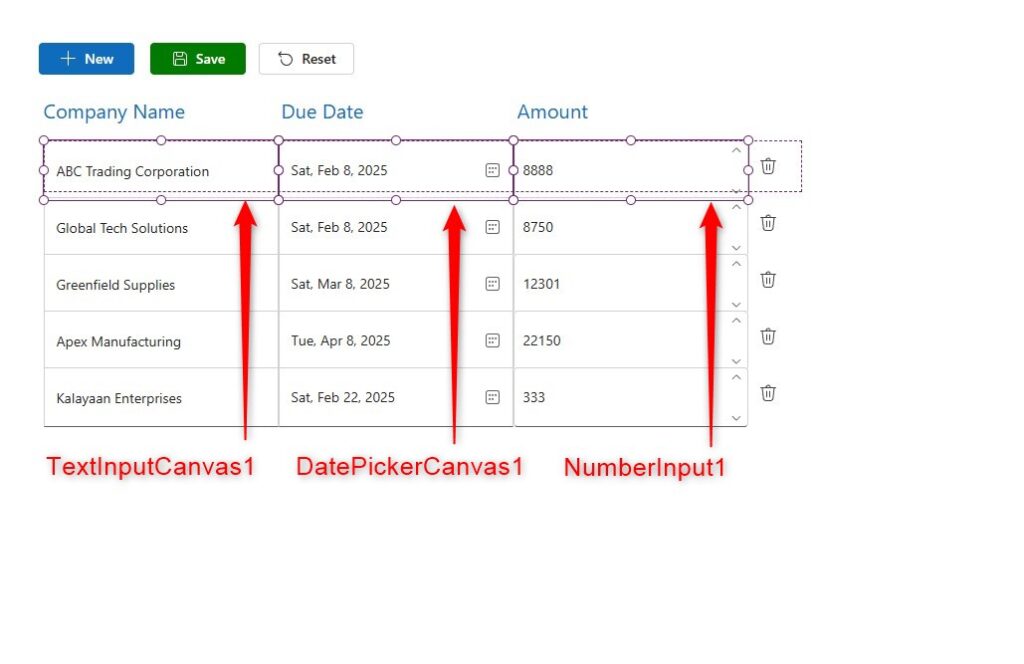
Inside Gallery1, insert a Text Input (modern) and name it TextInputCanvas1. Maximize the height and fill up about 1/3 of the gallery width. Change the following properties:
Appearance
'TextInputCanvas.Appearance'.OutlineBorderRadius
0OnChange
Patch(collAccountsReceviables,ThisItem,{CompanyName:Self.Value});Value
ThisItem.CompanyNameStep 11: Insert Date Picker
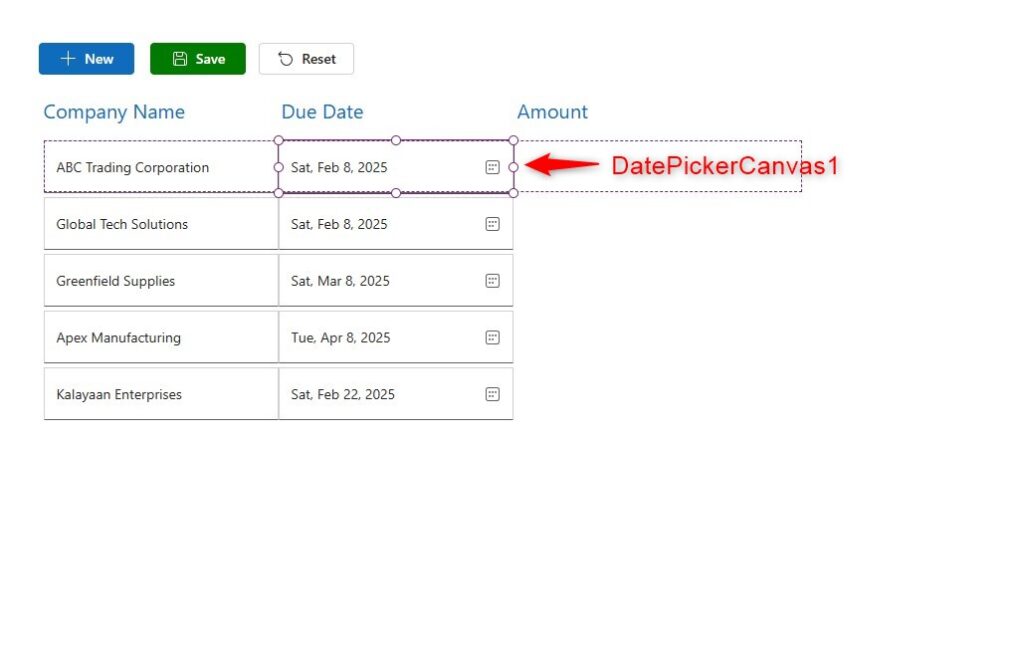
Step 11:
Inside Gallery1, insert a Date Picker (modern) and name it DatePickerCanvas1. Maximize the height and fill up about 1/3 of the gallery width. Change the following properties:
Appearance
'TextInputCanvas.Appearance'.OutlineBorderRadius
0OnChange
Patch(collAccountsReceviables,ThisItem,{DueDate:Self.SelectedDate});Selected Date
ThisItem.DueDateStep 12: Insert Number Input
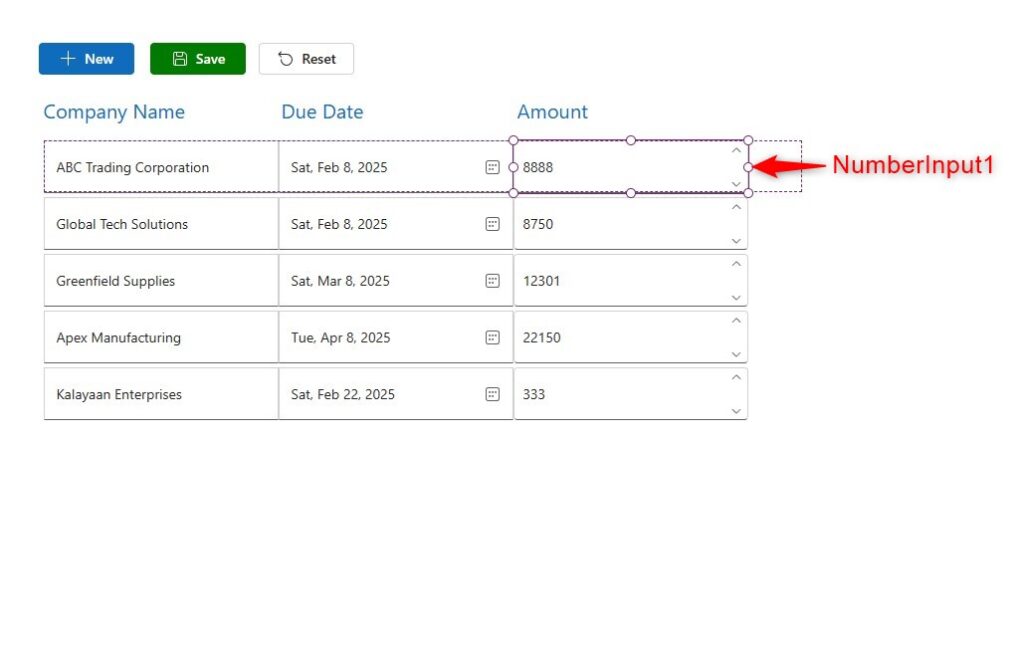
Step 12:
Inside Gallery1, insert a Number Input(modern) and name it NumberInput1. Maximize the height and fill up the remaining width but leave a small space for the delete button in the next step. Change the following properties:
Appearance
'TextInputCanvas.Appearance'.OutlineBorderRadius
0OnChange
Patch(collAccountsReceviables,ThisItem,{Amount:Self.Value});Value
ThisItem.AmountStep 13: Insert ‘Delete’ Icon

Step 13:
Inside Gallery1, insert a button (modern) and name it ButtonCanvas4. Fill in the remaining space. Change the following properties:
Appearance
'ButtonCanvas.Appearance'.TransparentIcon
"Delete"Text
""OnSelect
Patch(collAccountsReceviables,ThisItem,{IsDeleted:true});Note: This button will delete the record. This will not yet reflect in the SharePoint list until the user clicks on the save button.
Optional: Increase height of controls
Optional:
If you want to remove the small space in between the cells to make a clean border, you must increase the height of the controls within the properties pane. Select TextInputCanvas1, DatePickerCanvas1, and NumberInput1. Change the following properties:
Height
60Note: Since we set the gallery’s TemplateSize property in 52, then we set the field’s height to be higher than that.
Conclusion
To test the app, hit play mode and make some changes to the grid.
- Clicking the ‘New’ button will add a new row
- Make changes to the Company Name, Due Date, and Amount
- Click the trash button to remove the item
- Clicking Save will save the data to the SharePoint list and makes it permanent
- Clicking the Reset button when there are unsaved changes will revert the data back to after it was last saved.
Did this article help? Let us know how we can improve. Send us a message by clicking the “Contact Us” button below.
Article last updated on March 5, 2025
Need expert guidance on Power Apps?


