Power Automate – Only trigger when a column is a specific value
4 steps
Overview

This tutorial will show you how to make your flow’s ‘When an item…’ trigger only when a column value is of a specific value. In the following example, we will make a flow trigger only when both the SharePoint columns Approver1 and Approver2 is of the value “Approved”.
Our Set-up
![]() SharePoint list named Requests
SharePoint list named Requests
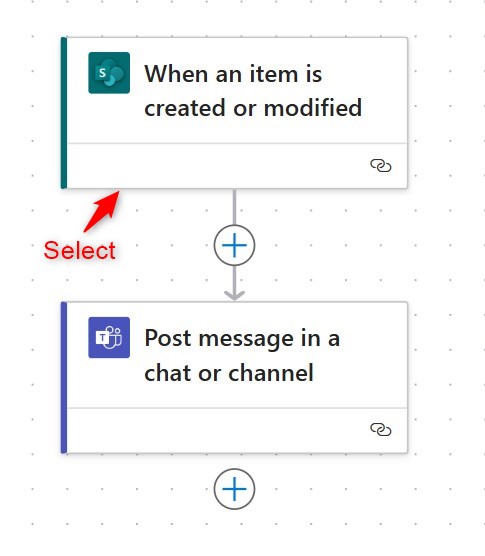
 Power Automate flow

Step 1: Select your trigger

Step 1:
Select the trigger of the flow
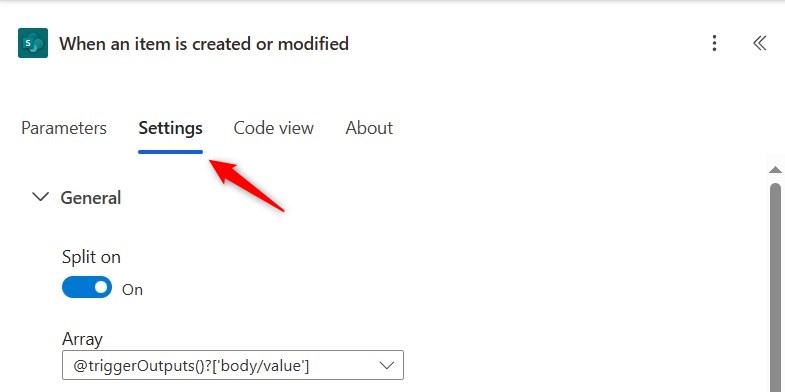
Step 2: Settings tab

Step 2:
Click the ‘Settings’ tab
Step 3: Add first trigger condition

Step 3:
Add a trigger condition. Use the code:
@equals(triggerOutputs()?['body/Approver1'], 'Approved')Note: The code here means that when the item’s Approver1 value is “Approved”, only then will it trigger.
Step 4: Add second trigger condition

Step 4:
Add another trigger condition. Use the code:
@equals(triggerOutputs()?['body/Approver2'], 'Approved')Note: The code here means that when the item’s Approver2 value is “Approved”, only then will it trigger.
Save the flow.
Conclusion

To test the flow, go to the SharePoint list and change one item’s Approver1 value into “Approved”. The flow should not trigger yet because we told it to trigger only when both columns equals “Approved”. Now change the same item’s Approver2 value into “Approved”. The flow should trigger in a while.
You can check the Run history of the flow and you will notice the flow was run only when both conditions were met.
Did this article help? Let us know how we can improve. Send us a message by clicking the “Contact Us” button below.
Article last updated on February 15, 2025
Need expert guidance on Power Apps?